
Connecting Google API to Databricks
This document details how to configure credentials to connect any google API such as Google Earth Engine, BigTable, and BigQuery.
Assumptions
- The FSDH will not provide credentials for the Google Cloud Platform and assumes the user has been provided an access by their department
- The user is familiar with the Google product used
1. Create a Google Cloud Project
Follow the link for instructions on how to create a Google Cloud Project.
2. Enable the APIs & Services necessary
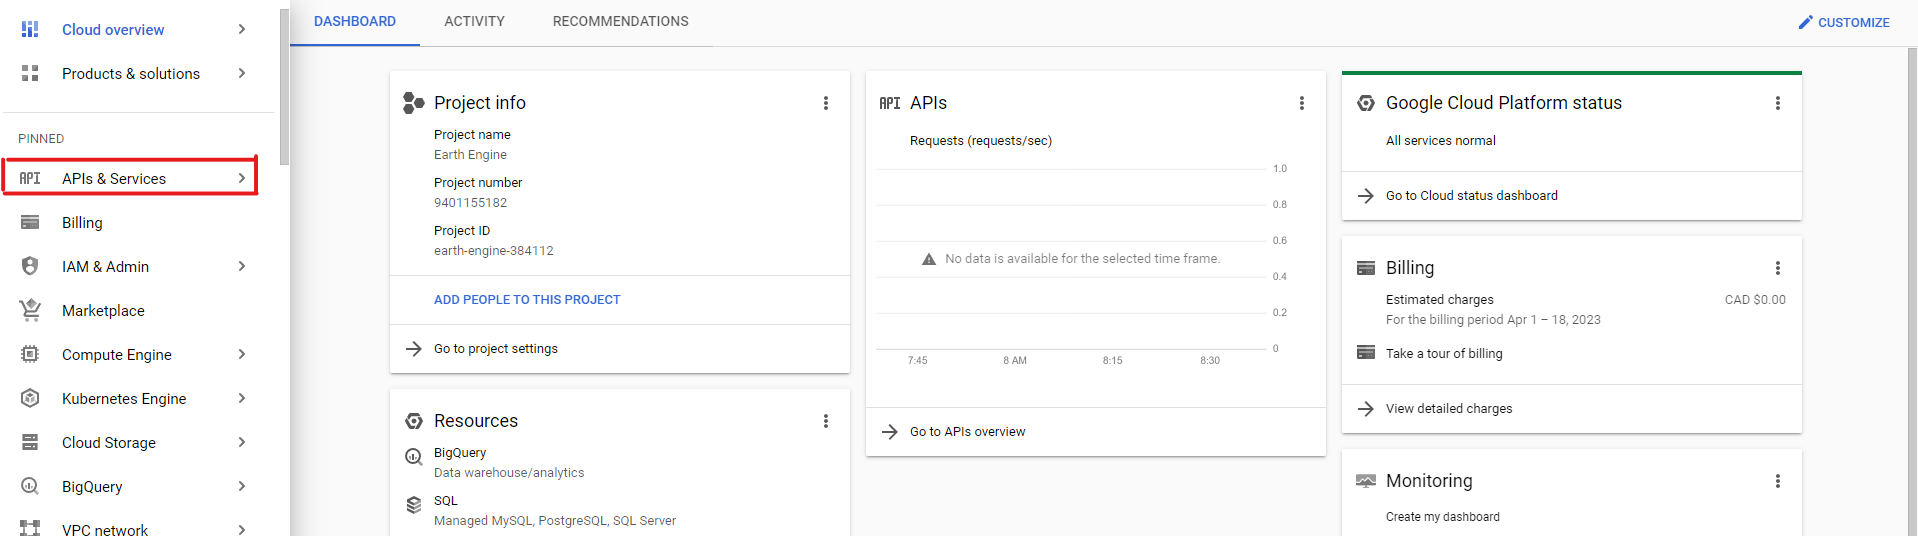
Once your project is created and selected, in the navigation bar, click on "APIs & Services":
Then click on "Enable APIs & Services":

Search for the services you may need such as "BigQuery API", "BigTable API", "Earth Engine API", etc. It should then appear in the search results. Click on it, then click on "Enable".
3. Create a Service account and obtain a private key.
Once you have enabled the APIs you need in your project, open the navigation menu and click on "IAM & Admin":
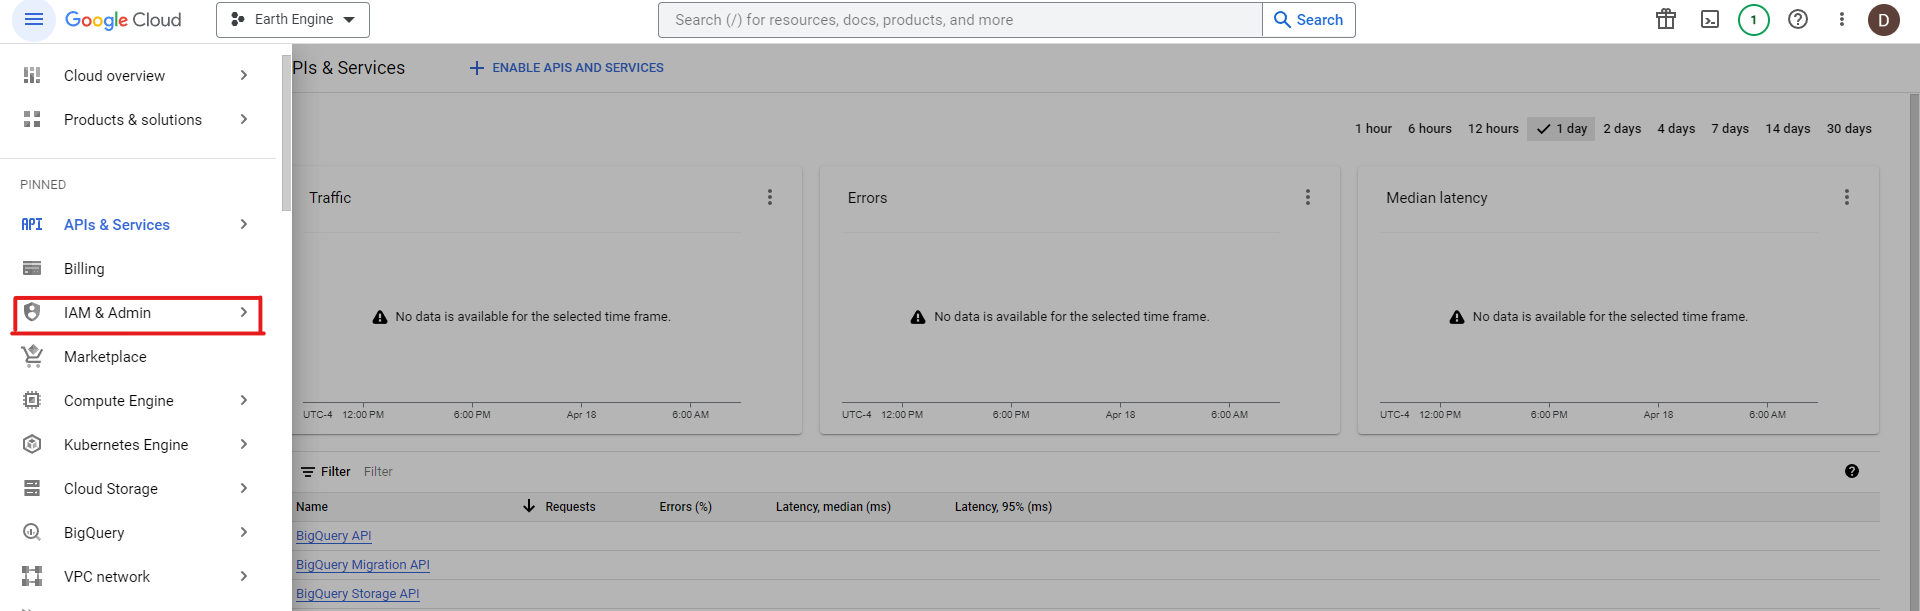
Then click on "Service Accounts":

Then create a new service account:
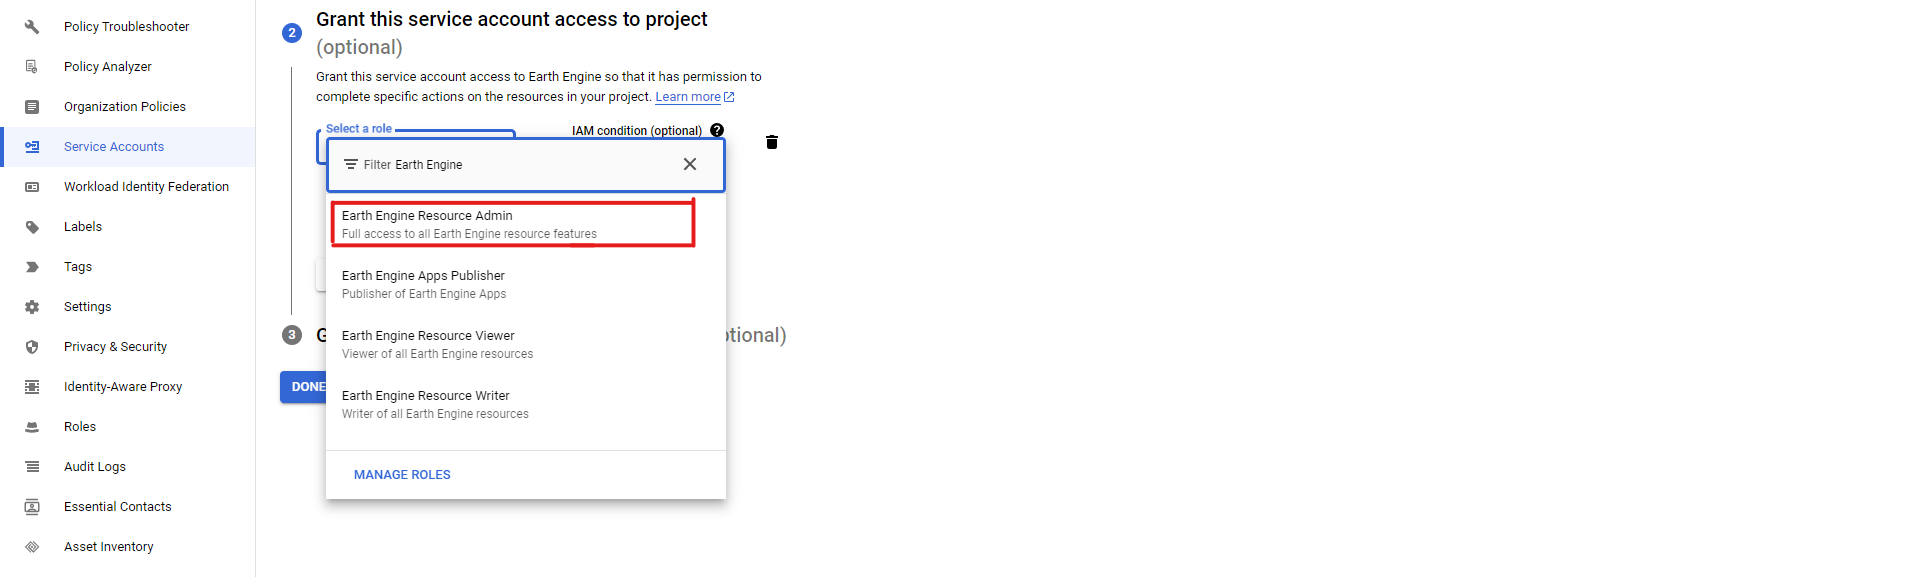
 Enter the necessary information (name, ID, description) in the first step, then in the second step, select the roles necessary for your service account. Depending on what service you are using, you will have to select the proper roles: for example, when using Earth Engine API, you need to select the admin, viewer or writer roles, depending on your needs:
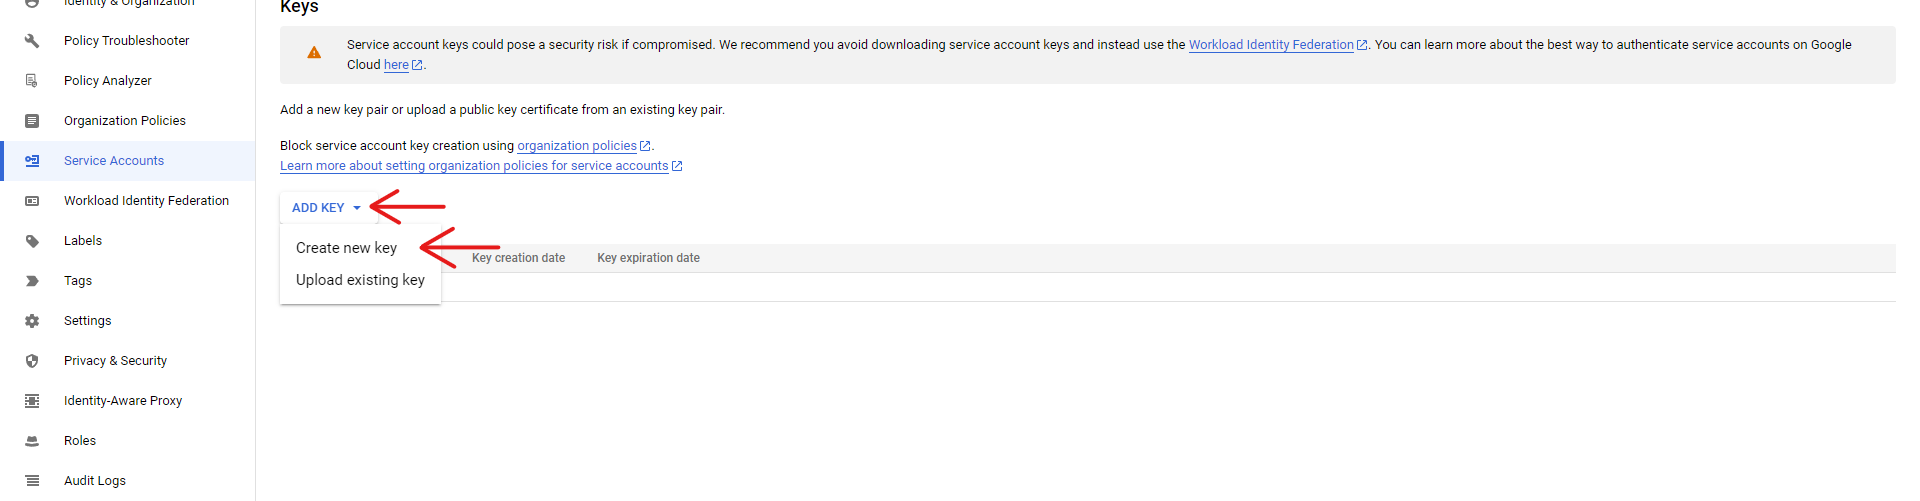
Then, skip the 3rd step and create your service account by clicking on "Done". This should bring you back to the list of all service accounts and you should see the service account you just created listed. Click on it, then click on the "Keys" tab:
 Click on "Add Key" and "Create new key", and select the JSON format for your key:
This will automatically create a key and download it. Make sure you keep this key.
4. Register your cloud project
In the case of certain APIs, you may need to register your Google Cloud project. For example, Google Earth Engine requires us to navigate to this registering link and sign-in using the same google account you use for Google Cloud, in order to register your project.
To register your Google Cloud
Select "Use with a Cloud Project"
Select "Paid" or "Unpaid usage" depending on your personal needs and role. In our case, we will select "Unpaid usage". It will prompt you to select a project type, select "Government".
Select "Choose an existing cloud project" and select the project you have enabled Google Earth Engine API in.
Finally, review the information you have given and confirm.
5. Install the client-side SDK for your service
Your service may require you to install a package on Databricks in order to use it, as is the case for Google Earth Engine API. For this step, we will demonstrate the installation of Google's Earth Engine API, but any packages can be installed that way.
There are two ways to install a package. To install a Python package in the notebook scope, run the following Python magic line (make sure to replace earthengine-api with your package name, which you may need to search online for):
%pip install earthengine-api
Upon the success of running this line, skip to the next step. If instead you want to install the package on the cluster, open the navigation bar on Databricks, and click "Compute". Select the cluster you want to install the package on, then click on libraries:
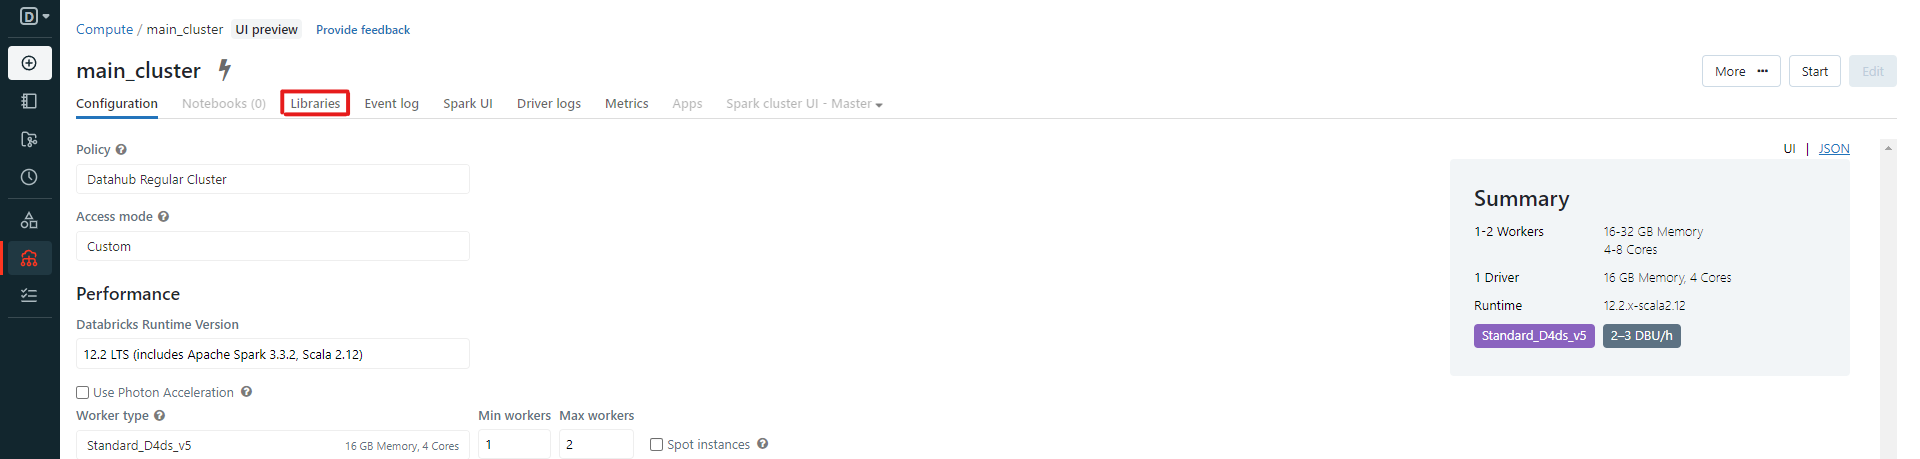
Then click on "Install new":
 In the pop-up menu, select PyPI, and in the "package name" field, enter the name of your package (for us:
 earthengine-api), then click "Install". Once you start your cluster, it will install the library and it will be available on all notebooks that are attached to this cluster.
6. Using your Google API
Begin by uploading the private key we created from step 3. You can do so by either uploading to your FSDH storage, or you can upload directly to Databricks. Take note of where your key is stored, then use the following code to link to it. This code was created for the case of using Earth Engine API, but the process is extremely similar from one service to another.
Using a private key uploaded through the Databricks File Upload
import ee

# Enter the email associated with your service account created in step 3:
service_account = 'my-service-account@...gserviceaccount.com'
# In our case:
service_account = 'david-rene@earth-engine-384112.iam.gserviceaccount.com'

# Enter the path to your credentials:
credsPath = '/dbfs/Filestore/tables/credentials.json'
# In our case, using a key that we uploaded through Databricks file upload:
credsPath = '/dbfs/FileStore/tables/earth_engine_384112_03e2e02ee924.json'

# EARTH ENGINE ONLY:
# We can then initialize a session:
credentials = ee.ServiceAccountCredentials(service_account, credsPath)
ee.Initialize(credentials)

# Let's test it out:
print(ee.Image("NASA/NASADEM_HGT/001").get("title").getInfo())
Using a private key uploaded to FSDH storage
import ee
import json

# Enter the email associated with your service account created in step 3:
service_account = 'my-service-account@...gserviceaccount.com'
# In our case:
service_account = 'david-rene@earth-engine-384112.iam.gserviceaccount.com'

# Enter the path to your credentials:
credsPath = '/mnt/fsdh-dbk-main-mount/path/to/credentials.json'
# In our case, using a key that we uploaded to FSDH storage:
credsPath = '/mnt/fsdh-dbk-main-mount/David/earth-engine-384112-72d27e31c3b7.json'

json_rows = spark.read.text(credsPath).collect() # Read the file using spark
creds = json.loads("".join([row.value for row in json_rows])) # Load it into a proper json/dict

# Dump into a json file with the original name but in filestore
newPath = "/dbfs/FileStore/tables/"+credsPath.split("/")[-1]
with open(newPath, "w") as f:
    json.dump(creds,f)

# EARTH ENGINE ONLY:
# We can then initialize a session:
credentials = ee.ServiceAccountCredentials(service_account, newPath)
ee.Initialize(credentials)

# Let's test it out:
print(ee.Image("NASA/NASADEM_HGT/001").get("title").getInfo())