
MLFlow: AutoML and Experiments
Databricks MLFlow is an integrated platform for the end-to-end machine learning lifecycle. It provides a centralized place to track experiments, manage models, and quickly deploy them into production. MLflow lets you log and query experiments using Python, REST, R API, and Java API APIs. You can use MLflow to record and query experiments, get run metrics, metrics history, and compare runs. MLflow is an API and UI for logging parameters, code versions, metrics, and output files when running your machine learning code and for later visualizing the results.
MLflow is organized around the concept of runs, which are executions of data science code. Runs are aggregated into experiments where many runs can be a part of a given experiment and an MLflow server can host many experiments. The MLflow component is an API and UI for logging parameters, code versions, metrics, and output files when running your machine learning code and for later visualizing the results.
In Databricks, there are two types of experiments:
- Workspace experiments are experiments that are created and managed in the Databricks workspace. You can use the Databricks experiment UI to view and manage these experiments. You can also use the MLflow API to log runs to these experiments.
- Notebook experiments are experiments that are created and managed in a notebook. You can use the MLflow API to log runs to these experiments. You can also use the Databricks experiment UI to view and manage these experiments.
Workspace Experiments and AutoML
Workspace experiments take advantage of AutoML, which is a feature of Databricks that automatically trains and tunes machine learning models. This allows user to build machine learning models with minimal effort and near no coding required. This feature is an out-of-the-box option for Databricks and it offers a variety of algorithms to choose from:
- Classification: Logistic Regression, Random Forest, Decision Tree, XGBoost, LightGBM
- Regression: Decision Tree, Random Forest, Linear Regresseion with stochastic gradient descent, XGBoost, LightGBM
- Forecasting: ARIMA, Prophet
In summary, AutoML will train several models using different algorithms and hyperparameters and select the best one based on the metric you choose. It will also provide you with a notebook that you can use to deploy your model.
The first step to using AutoML is to upload your training data to Databricks. You can do so by following this guide. You will also need a cluster with a ML runtime.
Once you have your data uploaded, you can create a new experiment by clicking on the Experiments tab on the left side of the screen. If you are using the old UI, you need to select Machine Learning from the top left dropdown menu.
Old UI: 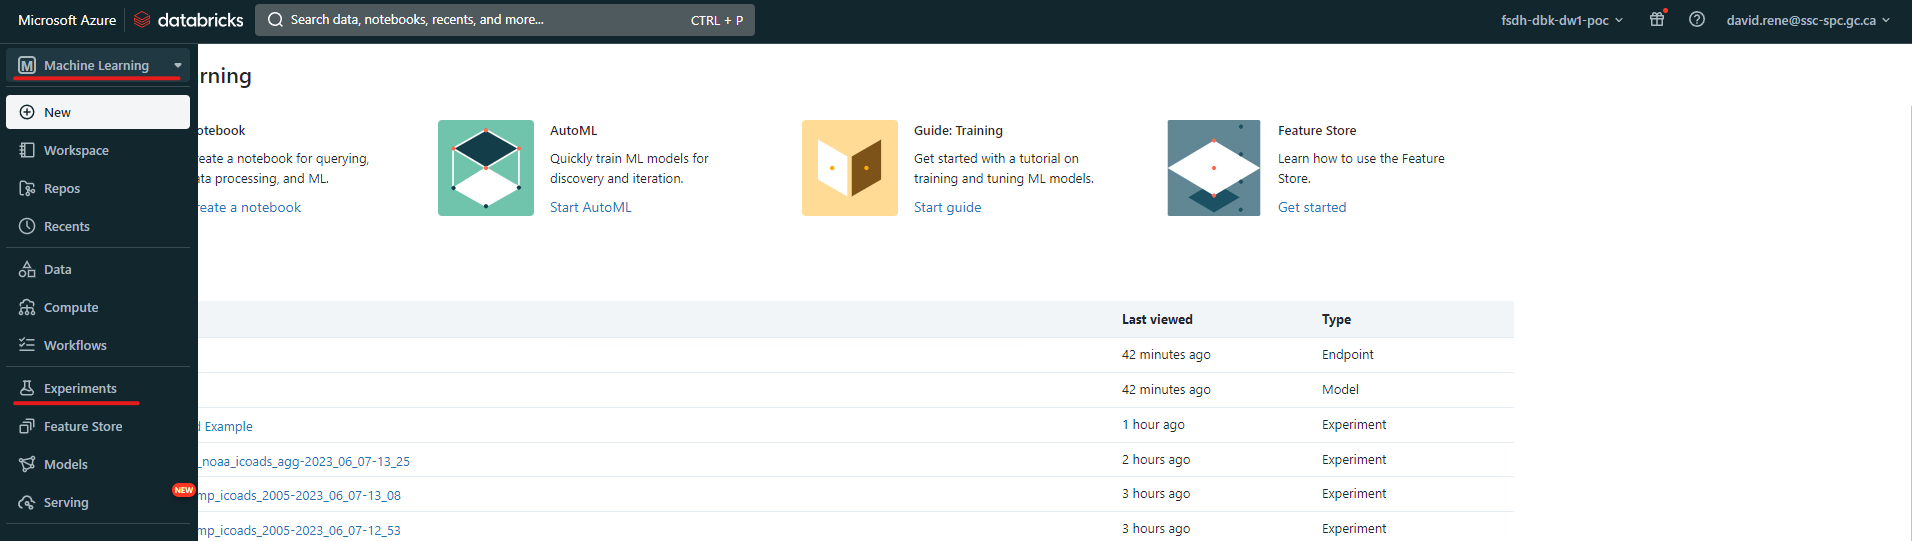
New UI: 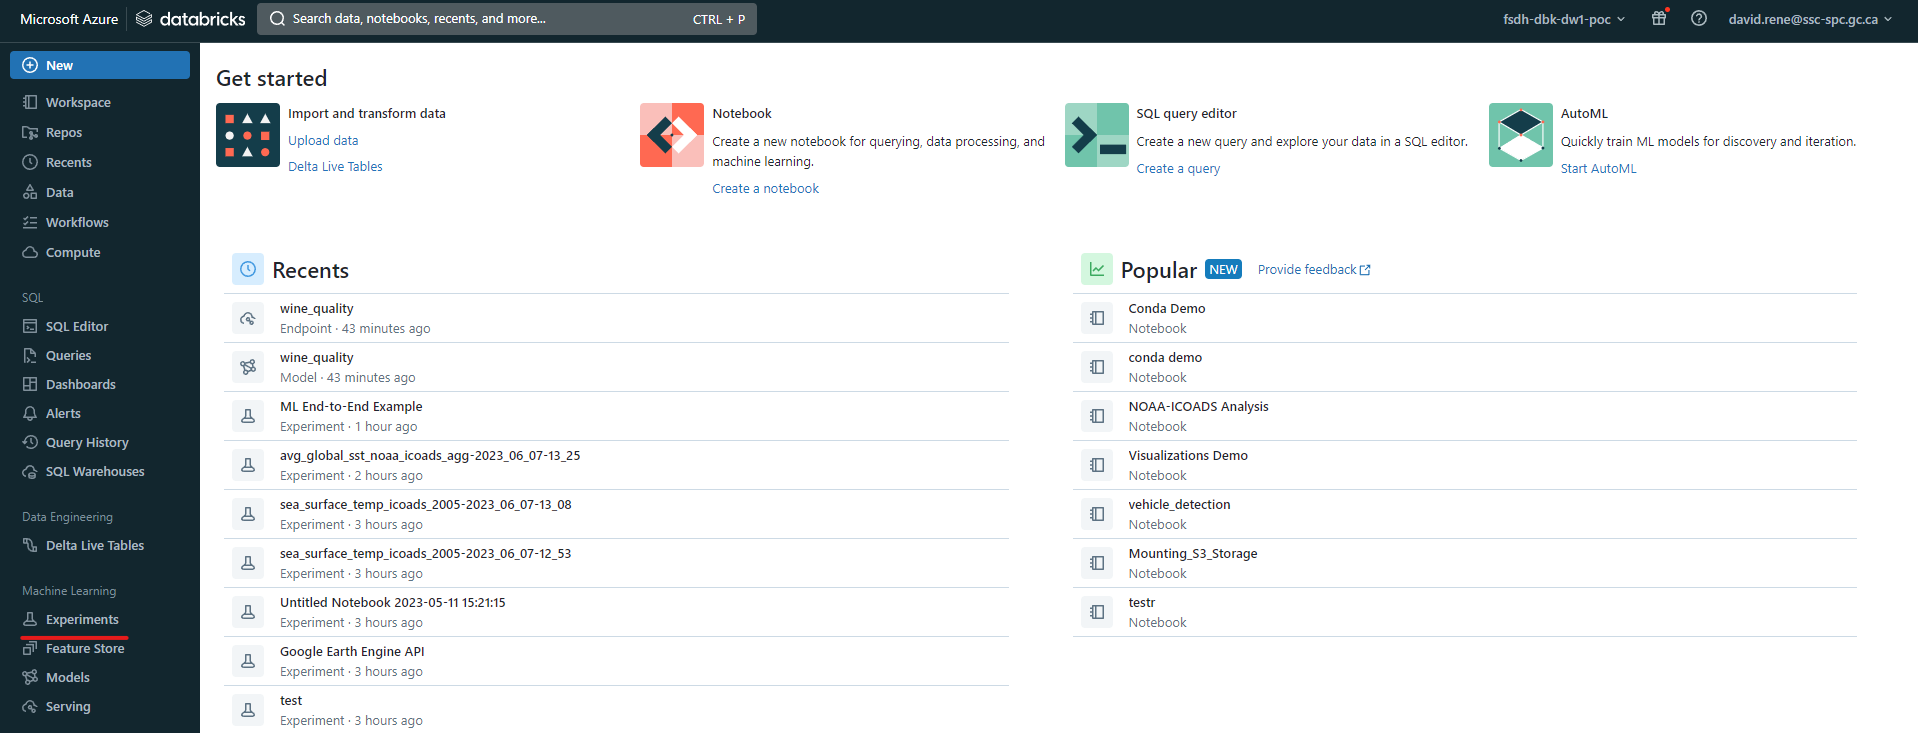
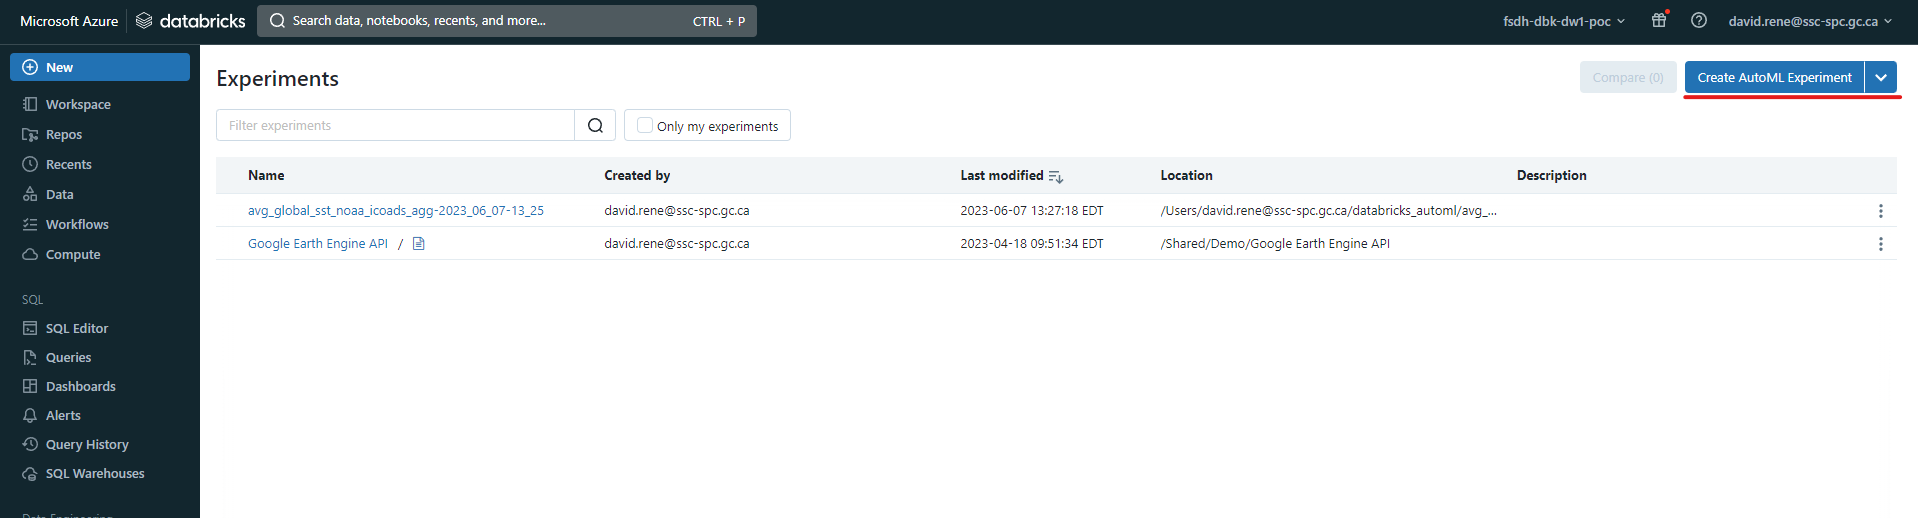
Once you've accessed the experiment page, you can click on the New Experiment button to create a new experiment:
 This will open the experiment creation menu:
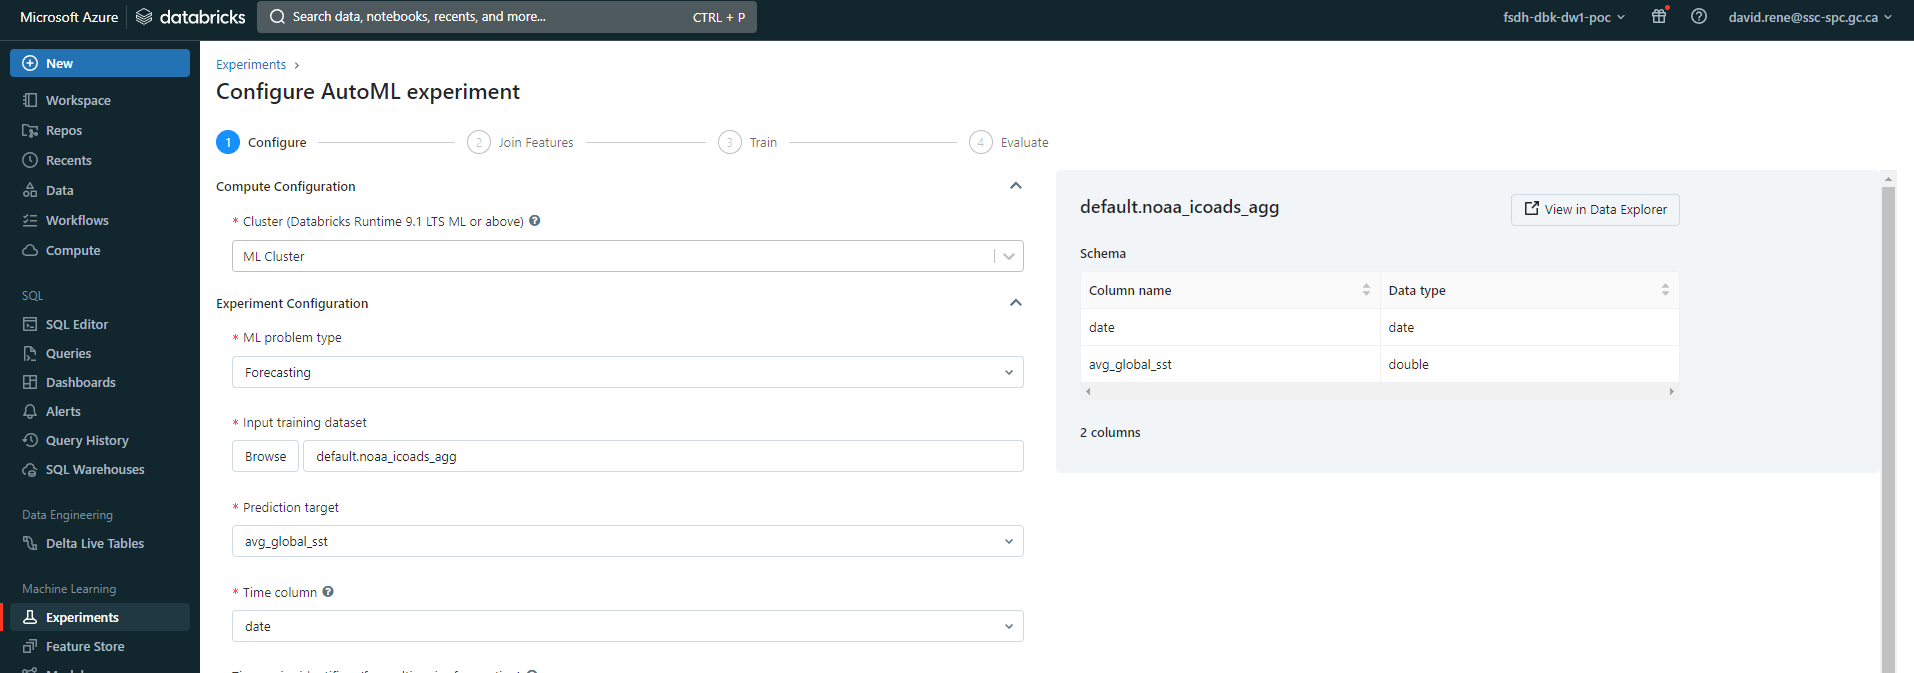
From there, you can configure your experiment. Certain configurations will be available only for certain ML problem types. The configurations are as follows:
- Cluster: the cluster you want to use for the experiment, as mentioned above, it must be a cluster with a ML runtime and it must be currently running.
- ML problem type: the type of problem you are trying to solve, either classification, regression or forecasting.
- Input training dataset: the dataset you want to use for training. As mentioned above, your data must be available within Databricks' SQL database.
- Prediction target: the column/feature you are attempting to predict.
- Experiment name: the name of your experiment.
There are also advanced configurations where you can specify the following:
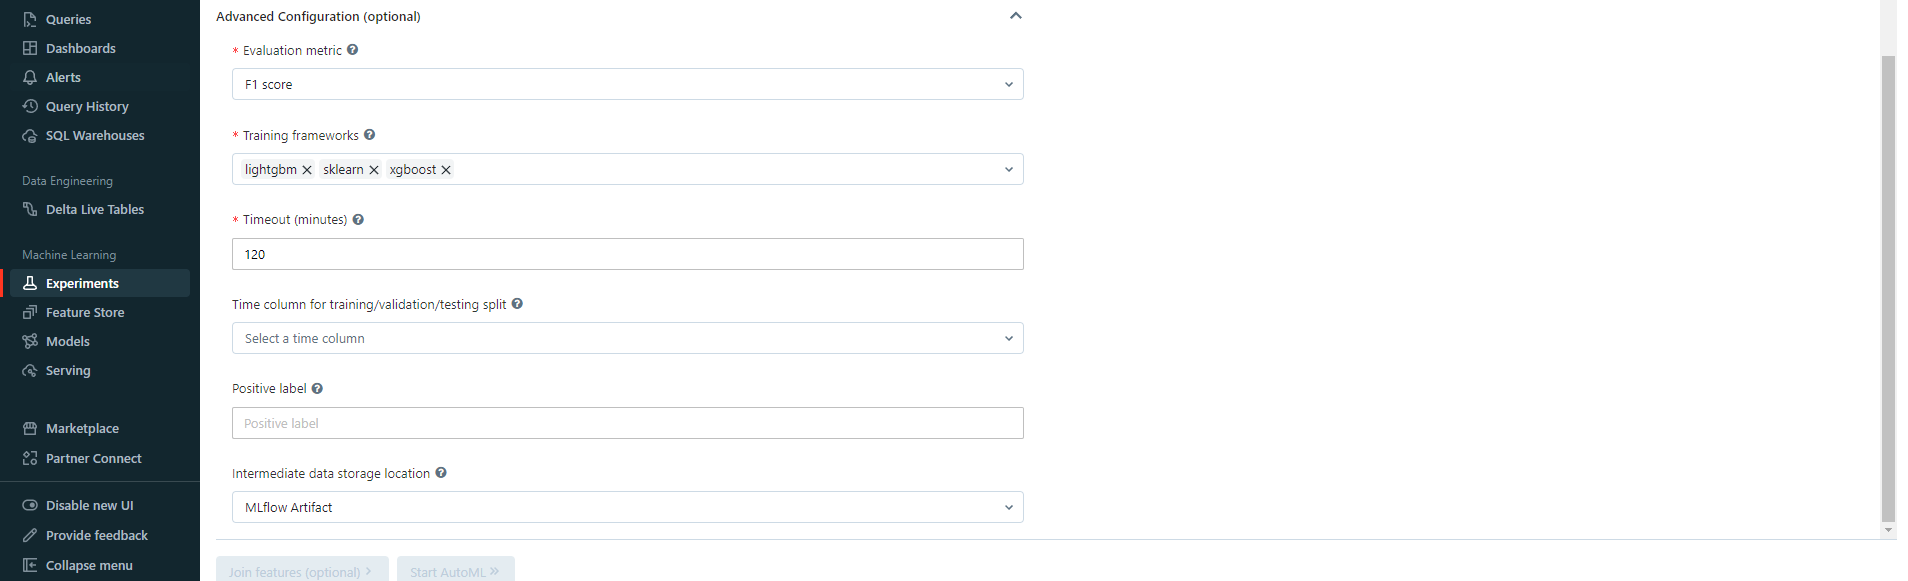
- Evaluation metric: the metric you want to use to evaluate your model. This will be used to compare models and select the best one. The metric you choose must be available for the problem type you selected.
- Training frameworks: the frameworks you want to use for training. Depending on your problem type, you will be able to choose from the list given above. Note that you can select several frameworks at once.
- Timeout: the maximum amount of time you want to allow for training. If the training time exceeds this value, the training will be stopped and the best model will be selected.
As well as other configurations.
Once you have configured your experiment, you can click on the Start AutoML button to create it. This will take you to overview page, where you can see the progress of your experiment:
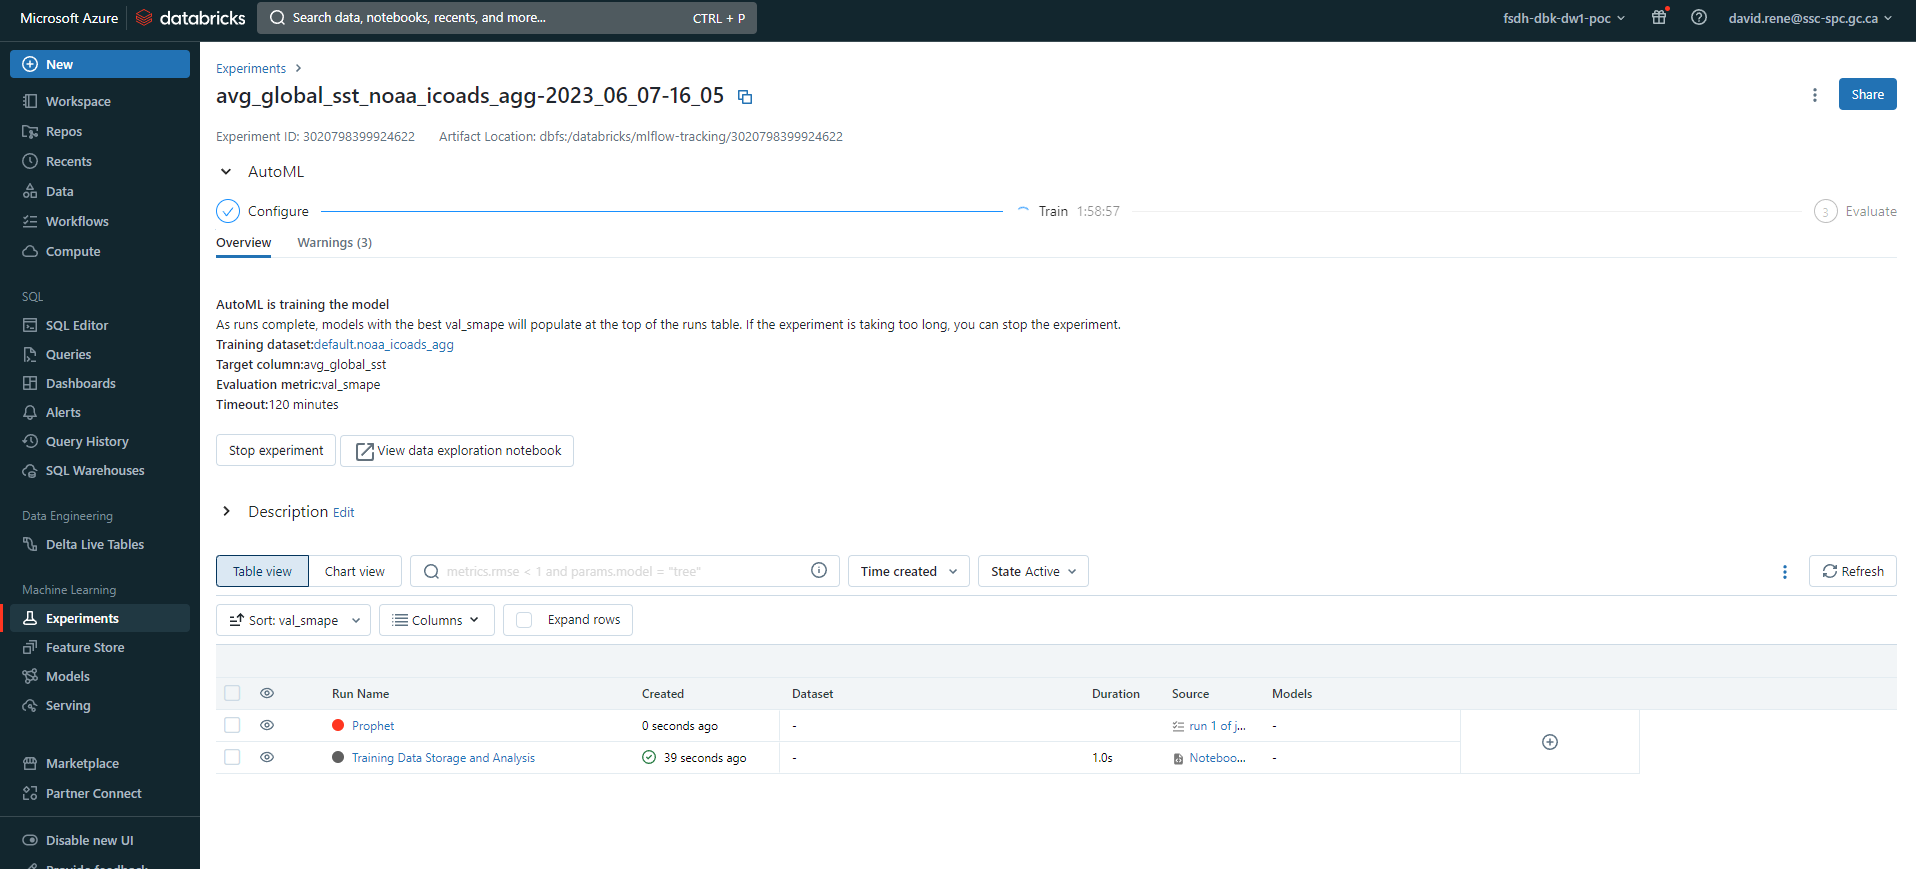
At the top, you can see general information about your experiment, you can view an auto-generated data exploration notebook and you can view the best model's notebook. You can also see the status of your experiment and the number of models that have been trained so far. At the bottom, you can see more information about the models that have been trained, including the model's name, the framework used, the training time, the metric value and the status.
Once your experiment is over, your models will be sorted by the error metric you chose, and as such you can then select the best model from the list. By clicking on it, you can register the model:
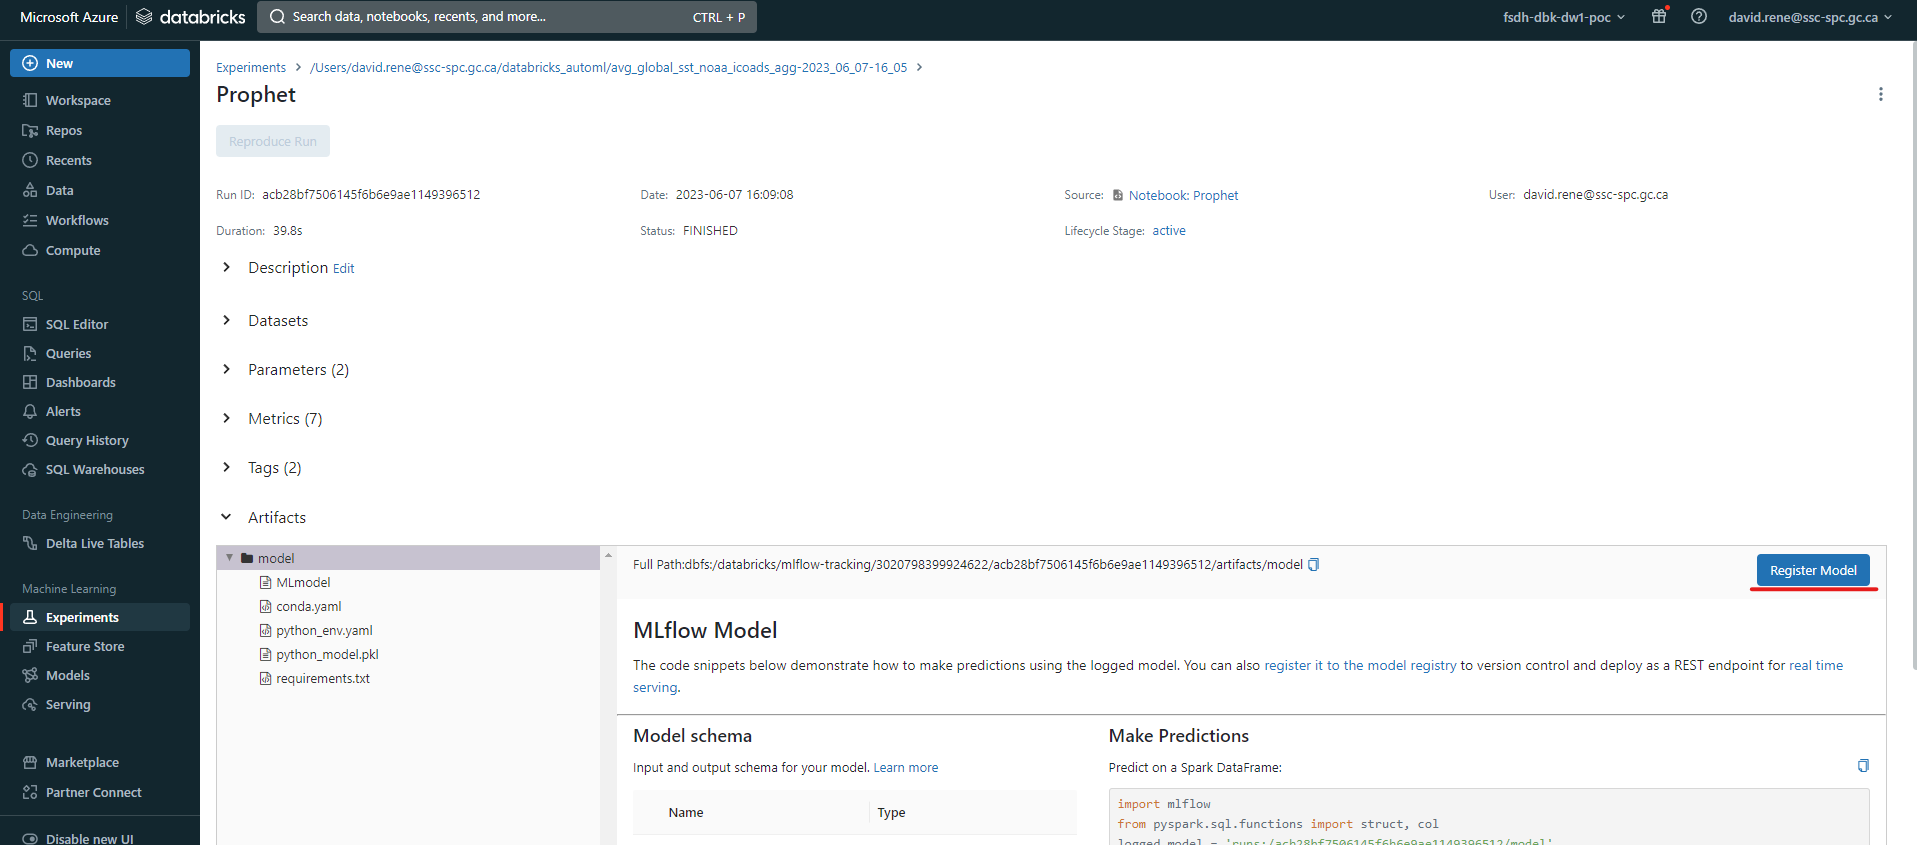
You will be prompted to select a name for your model, then you can click on Create.
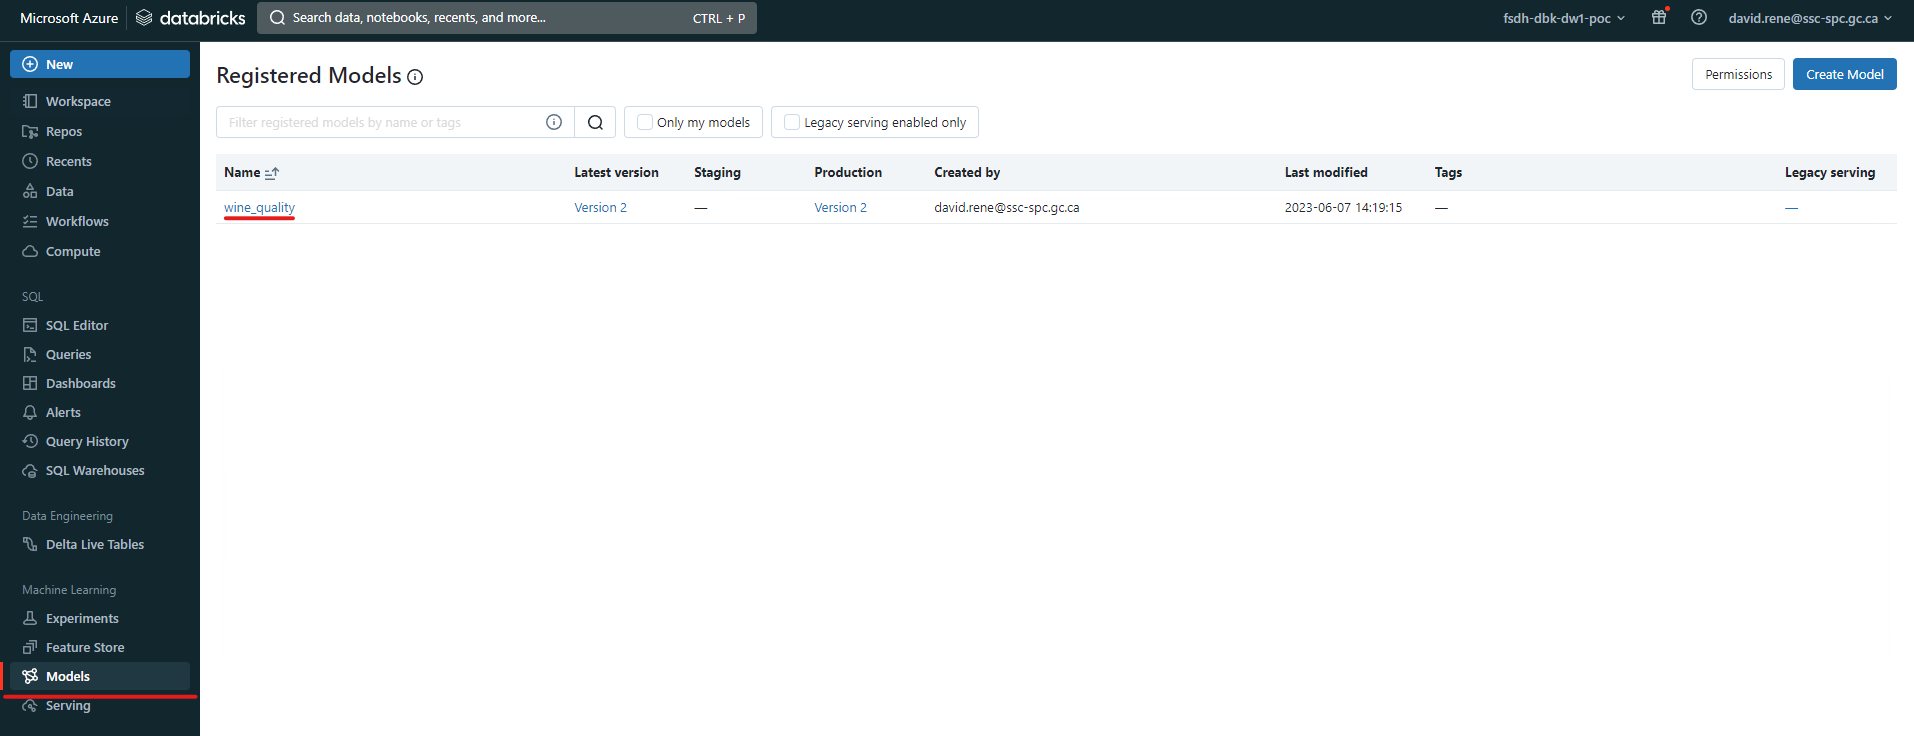
From this point onward, the model you have created will be available to whoever you give permissions to from the Models tab on the left side of the screen:
Upon clicking on a registered model, you will be able to see its details:
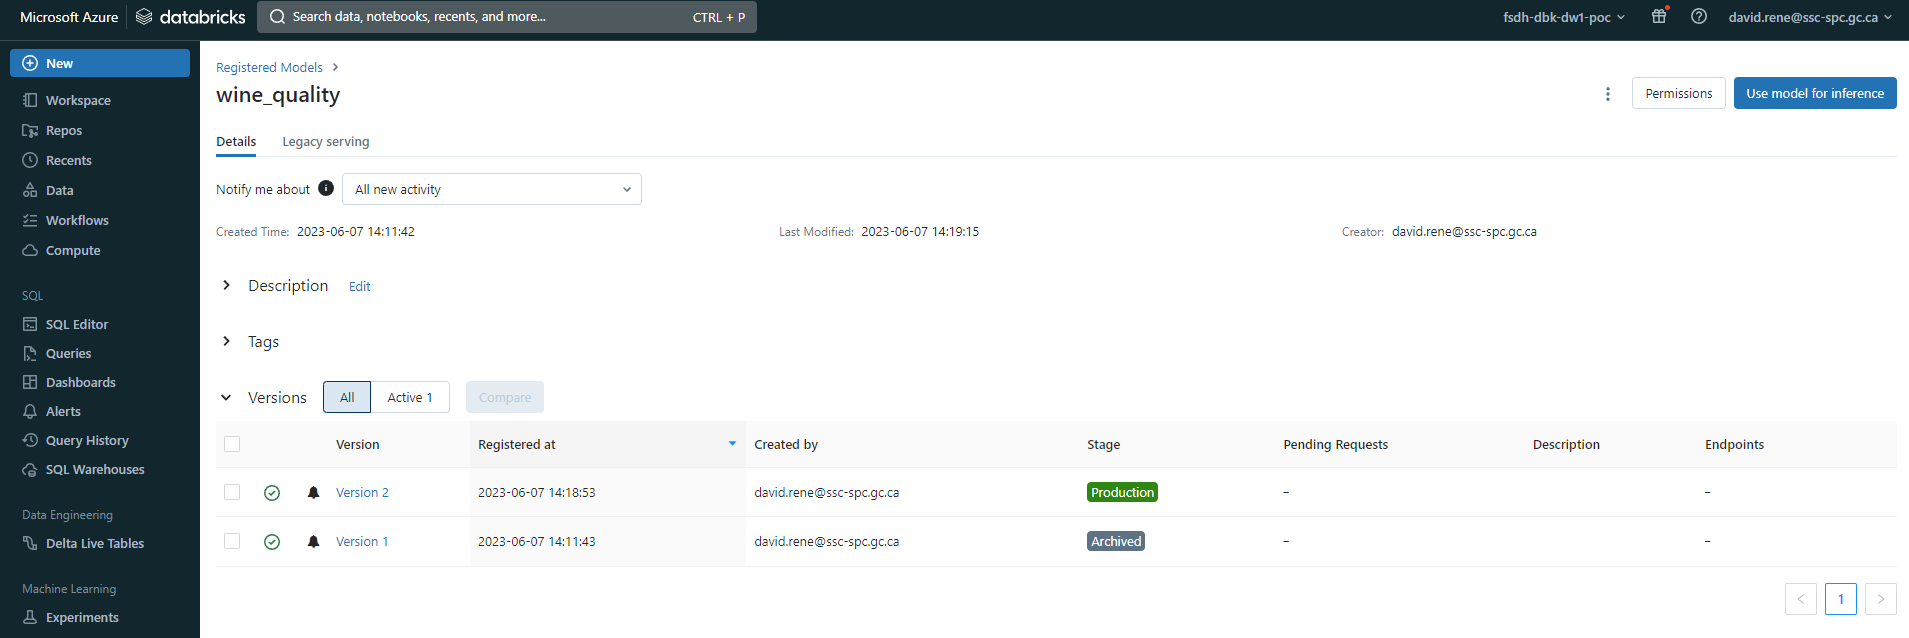 From there you can set it's stage, such as
 Production, Staging or Archived. You can also view the model's version history, which will show you the different versions of the model that have been created. You can also view the model's lineage, which will show you the different experiments that have been used to create the model.
On top of this, you can click on Use model for inference to auto-generate notebooks that can be used for using the model to infer or automatically apply the model to any available datasets.
Congrats! You have successfully created a model using AutoML and registered it for future use, without writing any code!
Notebook Experiments
Notebook experiments are experiments that are created and managed in a notebook. These are great if you require very specific machine learning code and if you need to do pre- or post-processing.
# mlflow.start_run creates a new MLflow run to track the performance of this model.
# Within the context, you call mlflow.log_param to keep track of the parameters used, and
# mlflow.log_metric to record metrics like accuracy.
with mlflow.start_run(run_name='untuned_random_forest'):
  n_estimators = 10
  model = RandomForestClassifier(n_estimators=n_estimators, random_state=np.random.RandomState(123))
  model.fit(X_train, y_train)

  # predict_proba returns [prob_negative, prob_positive], so slice the output with [:, 1]
  predictions_test = model.predict_proba(X_test)[:,1]
  auc_score = roc_auc_score(y_test, predictions_test)
  mlflow.log_param('n_estimators', n_estimators)
  # Use the area under the ROC curve as a metric.
  mlflow.log_metric('auc', auc_score)
  wrappedModel = SklearnModelWrapper(model)
  # Log the model with a signature that defines the schema of the model's inputs and outputs.
  # When the model is deployed, this signature will be used to validate inputs.
  signature = infer_signature(X_train, wrappedModel.predict(None, X_train))

  # MLflow contains utilities to create a conda environment used to serve models.
  # The necessary dependencies are added to a conda.yaml file which is logged along with the model.
  conda_env =  _mlflow_conda_env(
        additional_conda_deps=None,
        additional_pip_deps=["cloudpickle=={}".format(cloudpickle.__version__), "scikit-learn=={}".format(sklearn.__version__)],
        additional_conda_channels=None,
    )
  mlflow.pyfunc.log_model("random_forest_model", python_model=wrappedModel, conda_env=conda_env, signature=signature)
Above is an example of how to use experiments from within Python notebooks. This example is taken from the Databricks documentation.
By opening the mlflow.start_run context, you can log parameters and metrics to the experiment. You can also log the model itself! This will allow you to register the model for future use, just like as shown in the "Workbook Experiments" section.
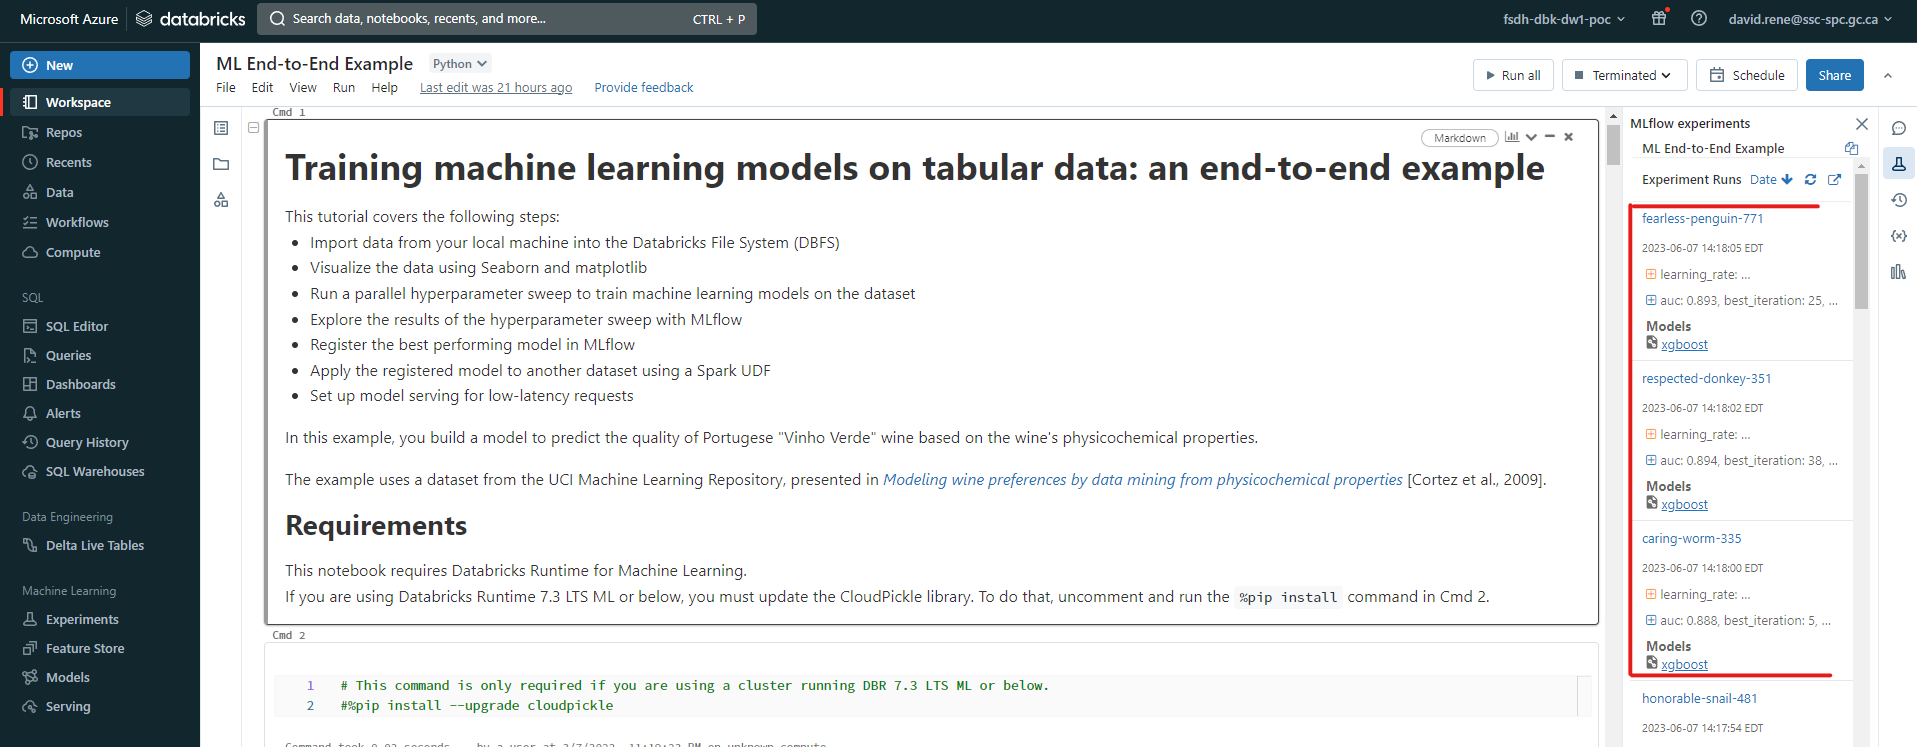
Running this code will automatically create an experiment for you, which you can access in the Experiments tab on the left side of the screen, and each run you create will be added to that experiment. You can also view all the runs you have created in a notebook by clicking the MLFlow experiments icon on the right hand side:

From there, you can view your runs, their associated models, their logged parameters and metrics:
 Again, make sure to check out the end-to-end ML example notebook as well as the MLFlow databricks API documentation to learn more about how to run experiments from within notebooks.
Learn more
For more information about MLFlow and AutoML, refer to Databricks MLFlow Documentation and Notebook experiment example