
Getting Started with Databricks
Databricks is a unified data analytics platform that combines the power of Apache Spark with a collaborative environment for data science and machine learning. It provides a fully managed, scalable, and secure cloud-based environment for data processing, analytics, and machine learning workloads.
This guide will help you get started with Databricks on the Federal Science DataHub. It will focus on:
- Provisioning and accessing Databricks from the DataHub
- Managing Databricks clusters
- Creating and running notebooks
Provisioning and Accessing Databricks from the DataHub
To get started with Databricks on the Federal Science DataHub, you will need to provision a Databricks workspace and access it from the DataHub portal.
Provisioning a Databricks Workspace
Note: Only a DataHub workspace administrator or workspace lead can provision a Databricks workspace.
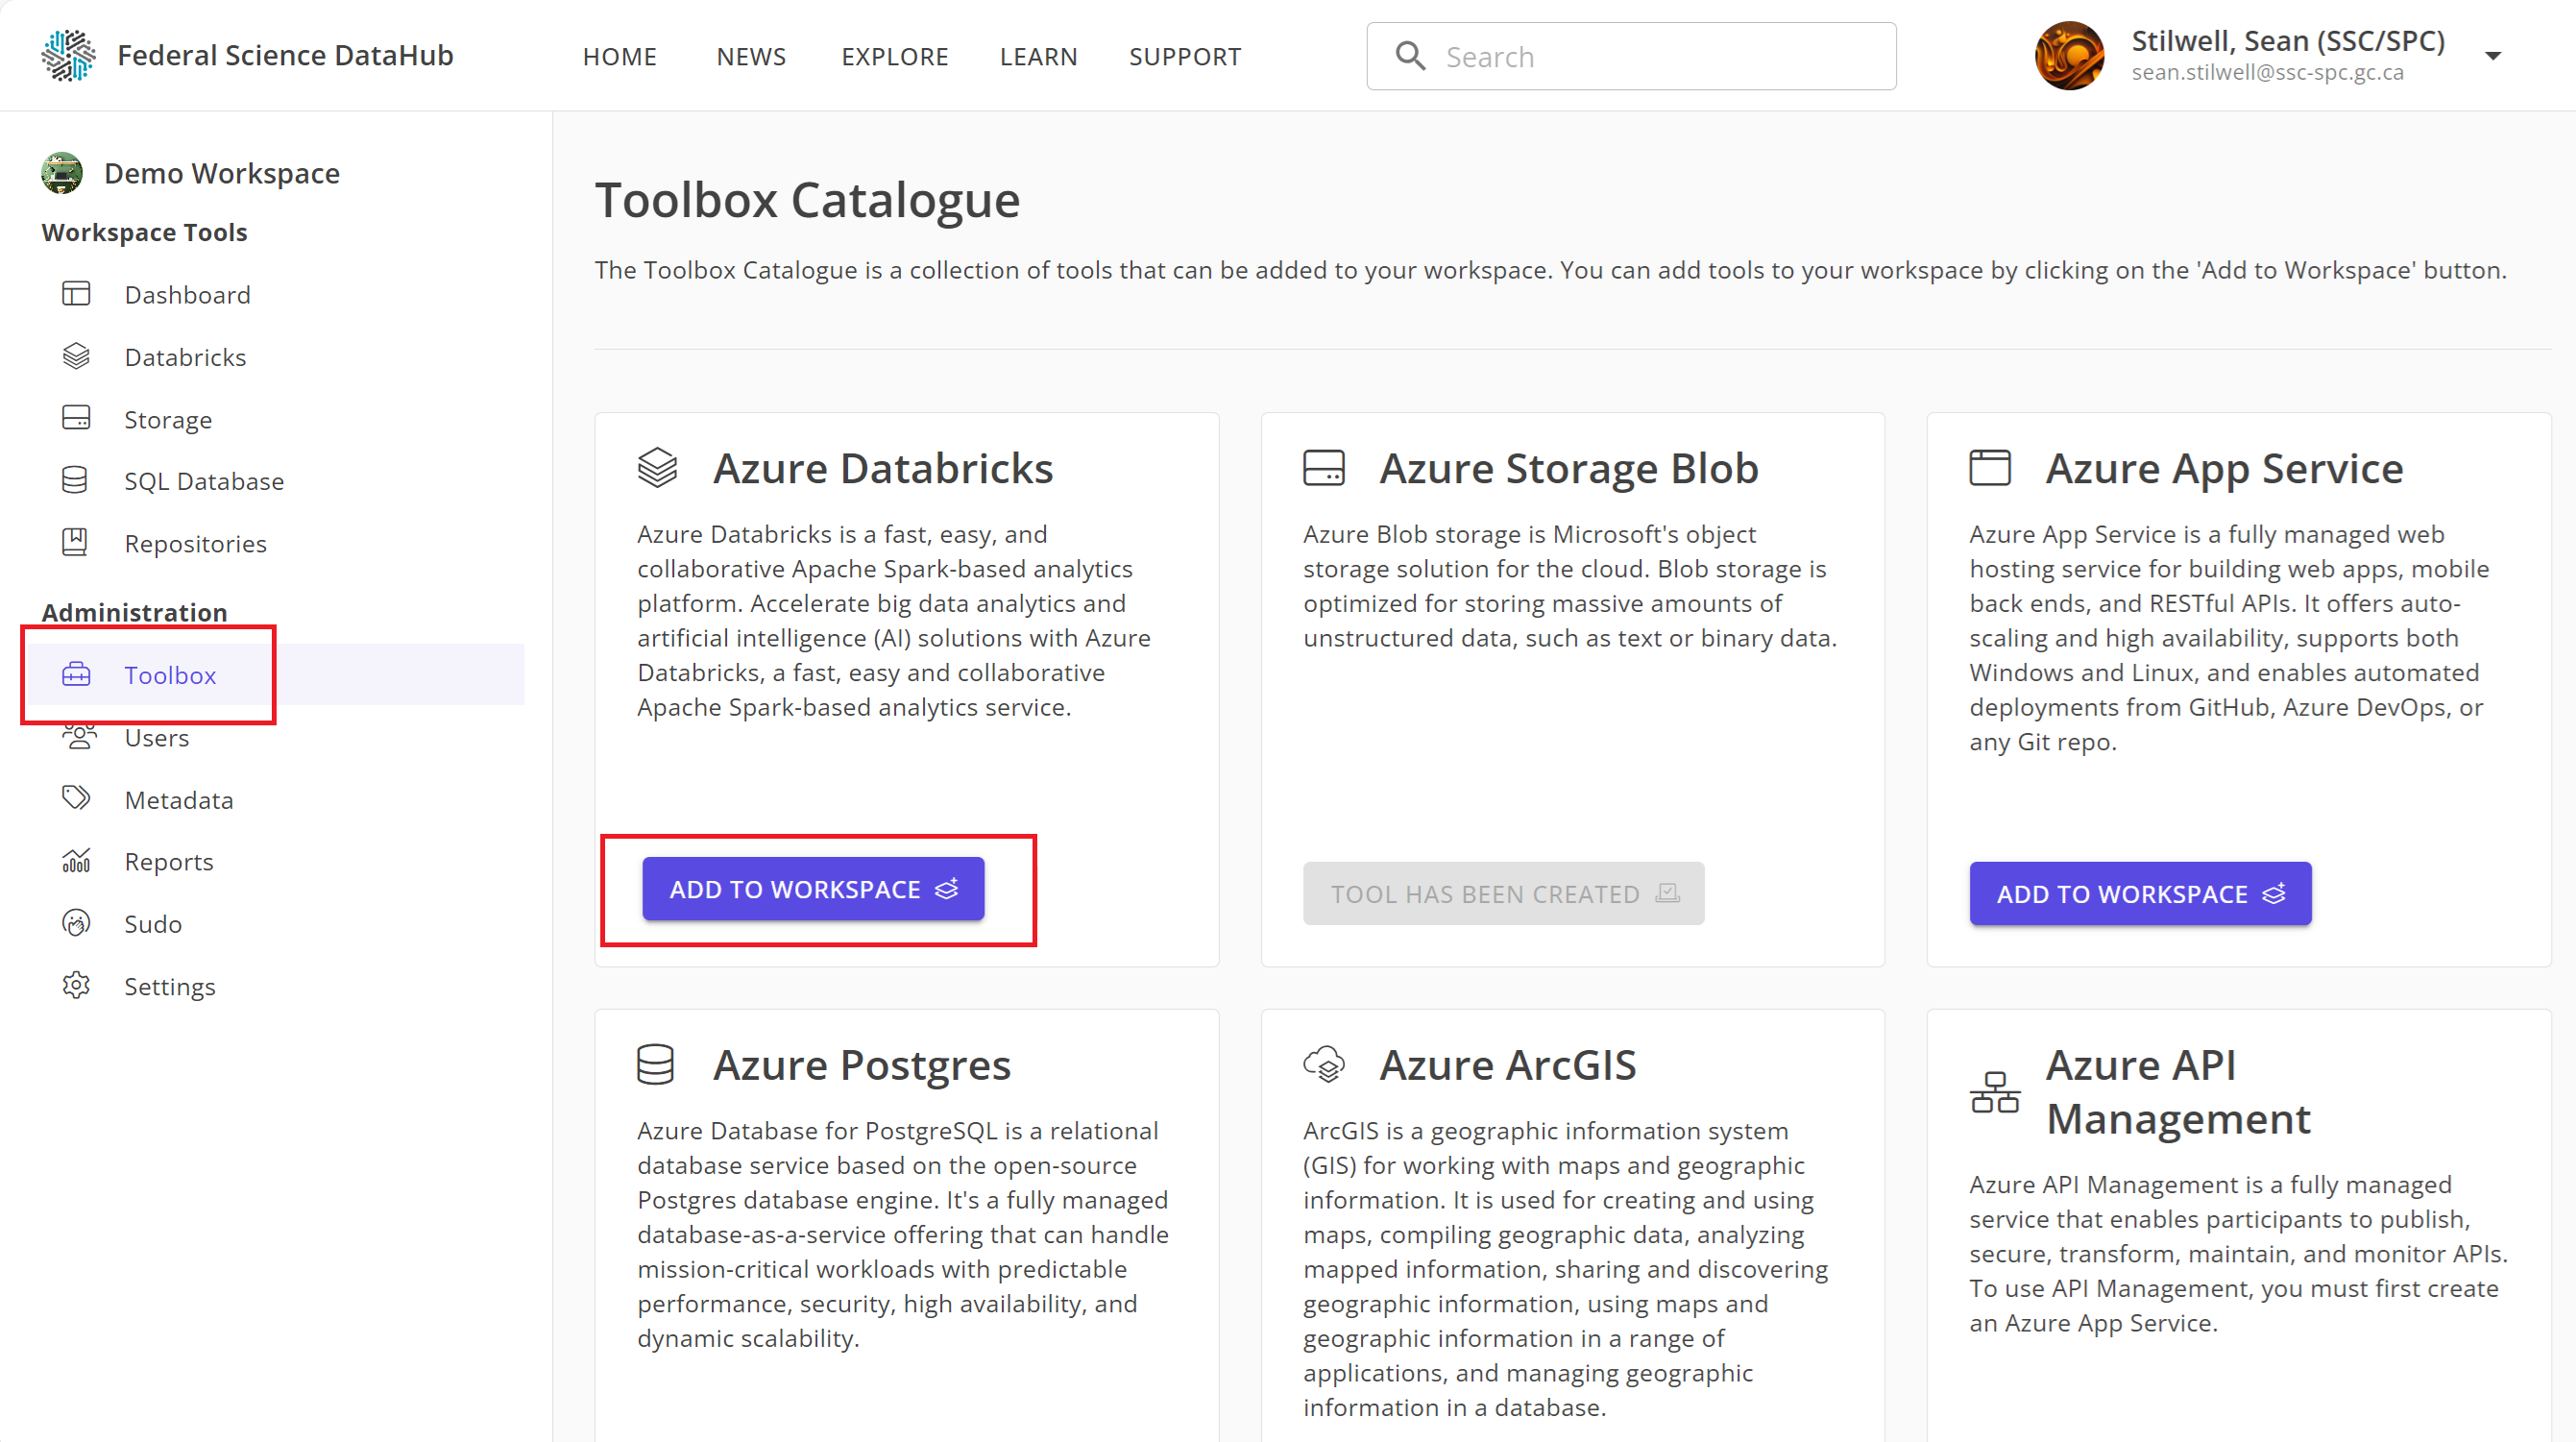
To provision a Databricks workspace:
- Navigate to your DataHub workspace.
- Click on the
Toolboxtab on the left-hand side. - Under the Databricks card, click on
Add to Workspace.
After a few minutes, the Databricks workspace will be provisioned and added to your DataHub workspace.
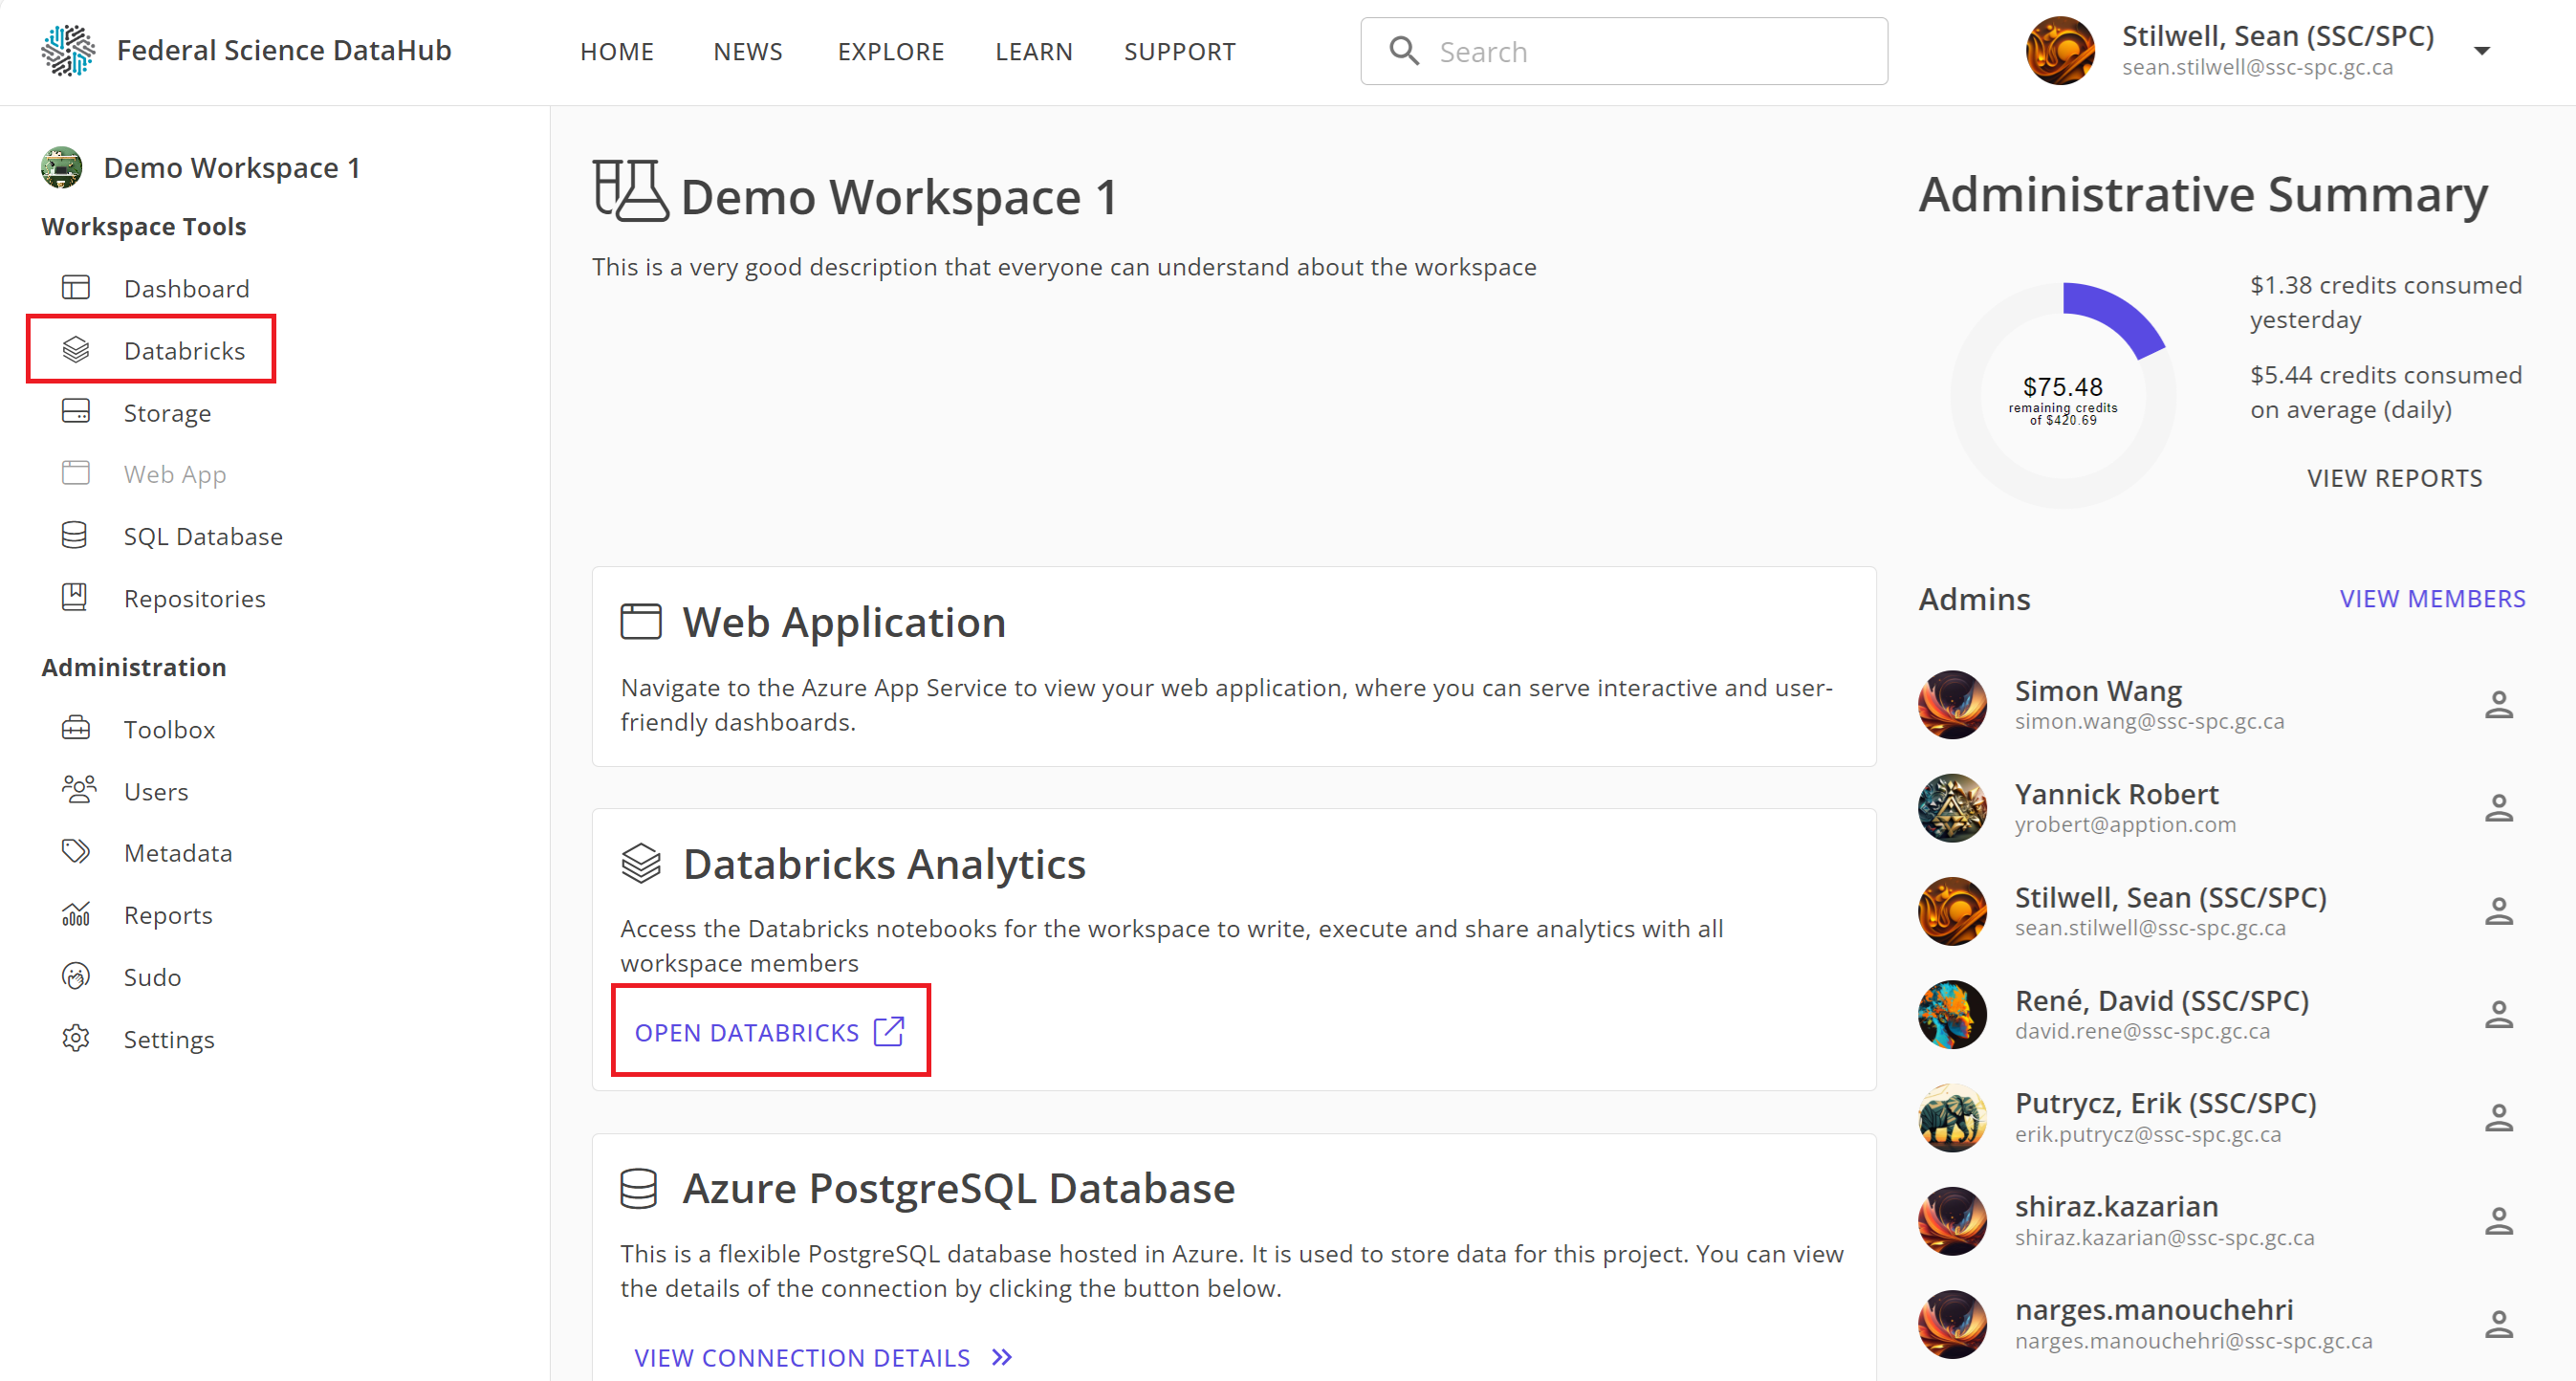
Accessing Databricks from the DataHub
Once the Databricks workspace is provisioned, you can access it from the DataHub portal by two ways:
- Click on
Databricksin the left-hand sidebar, or - From the dashboard, click
Open Databricksunder the Databricks card.
Note: You will be prompted to sign in again using your M365 credentials (the same credentials used to sign in to the DataHub portal).
Managing Databricks Clusters
Databricks clusters are groups of virtual machines that power your data processing and analytics workloads. You can create, manage, and terminate clusters from the Databricks workspace.
By default, we create the main_cluster that we recommend you use for your workloads. It is already configured to access your storage account. Sometimes, you may need to create different clusters for other workloads.
Creating a Databricks Cluster
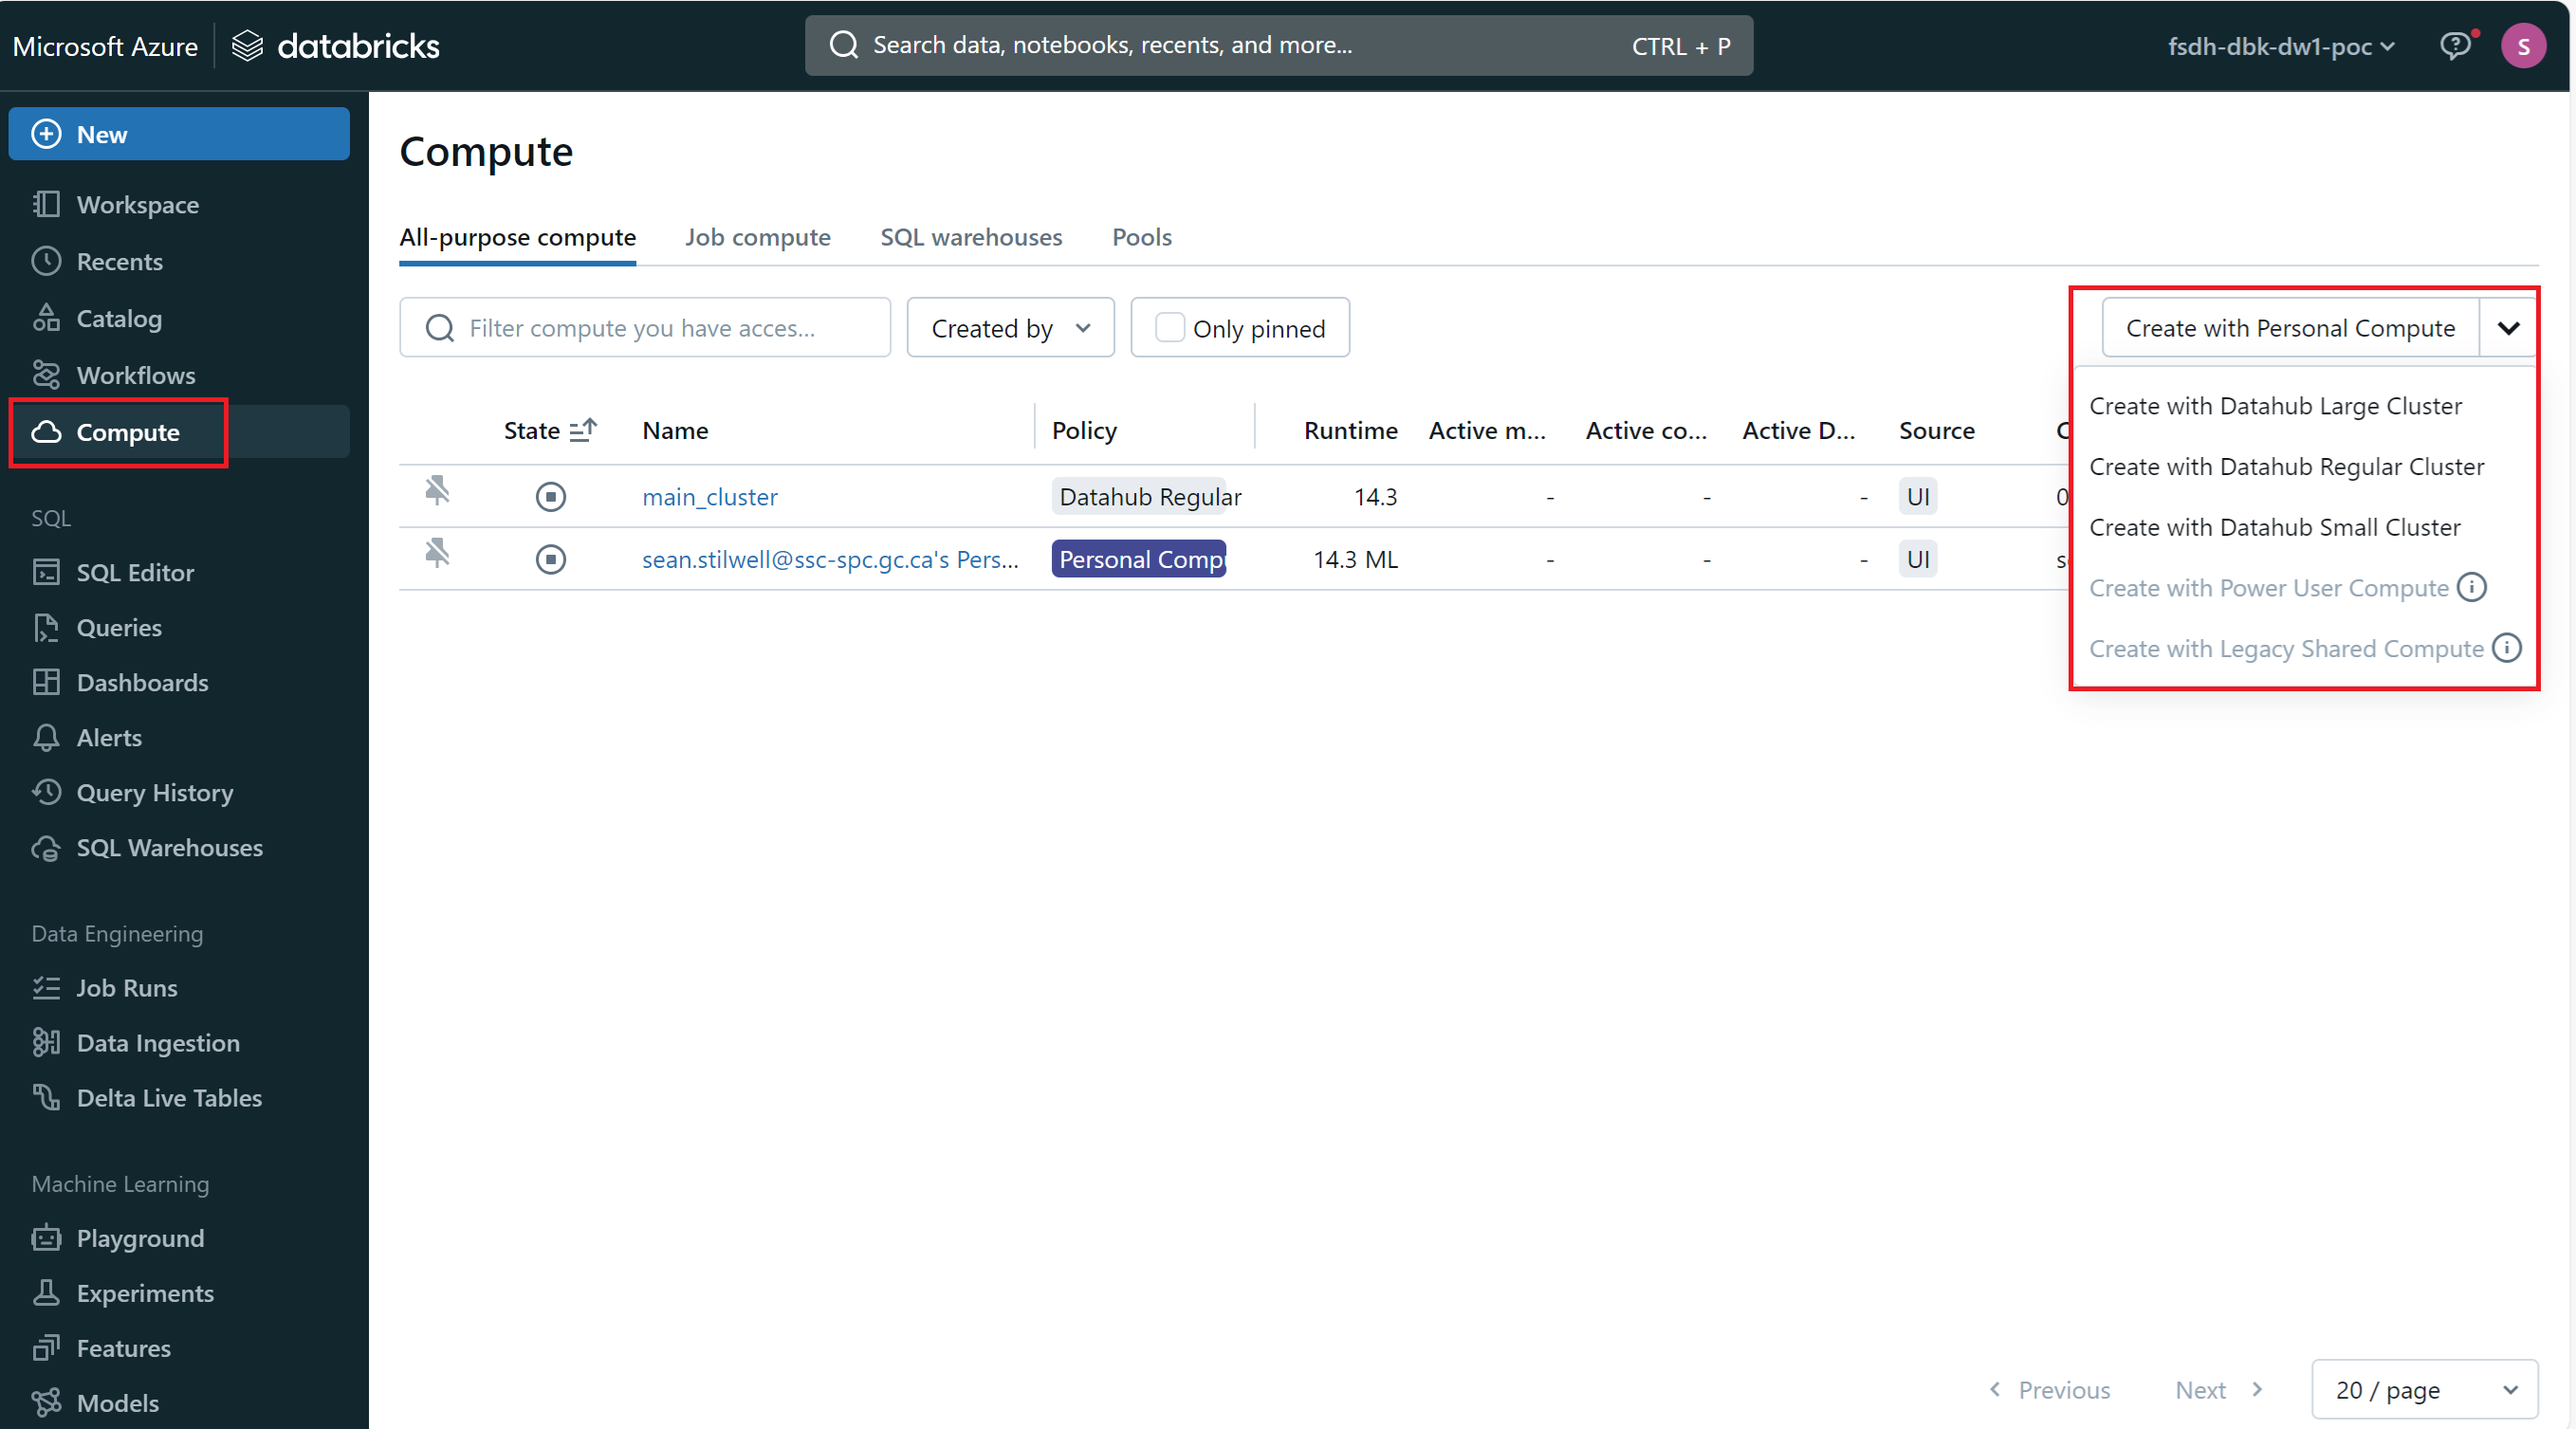
To create a new Databricks cluster:
- Navigate to the Databricks workspace.
- Click on the
Computetab on the left-hand sidebar. - Click on either
Create with Personal Computeor choose one of the pre-configured cluster types from the dropdown. - Configure the cluster settings, such as the cluster name, instance type, and number of worker nodes.
- Click
Create Cluster.
The new cluster will be created and ready for use.
Note: We provide a detailed guide on different clusters. You can refer to the Databricks Cluster Policies guide for more information.
Starting and Terminating a Databricks Cluster
To start or terminate a Databricks cluster:
- Navigate to the Databricks workspace.
- Click on the
Computetab on the left-hand sidebar. - Click on the cluster you want to start or terminate.
- Click on
StartorTerminateto manage the cluster.
Creating and Running Notebooks
Databricks notebooks are interactive documents that contain code, visualizations, and narrative text. You can create, edit, and run notebooks in the Databricks workspace.
If you're familiar with Jupyter notebooks, Databricks notebooks are similar but with additional features and integrations.
Creating a Databricks Notebook
To create a new Databricks notebook:
- Navigate to the Databricks workspace.
- Click on the
Workspacetab on the left-hand sidebar. - Click on the folder where you want to create the notebook.
- Click on
Createand selectNotebook.
At the top of the notebook, you can select which type of code you want to write. You can choose between Python, Scala, SQL, and R.
You can now start writing code, adding visualizations, and documenting your work in the notebook. You should give your notebook a meaningful name to help you identify its purpose.
Writing Code in a Databricks Notebook
Databricks notebooks support multiple programming languages, including Python, Scala, SQL, and R. You can write code in different cells and execute them interactively.
Notebooks are split into different cells. You can run each cell individually or run the entire notebook. This allows you to test and iterate on your code easily.
You can also include text cells with Markdown. This allows you to document your code, explain your thought process, and add visualizations to your notebook.
Accessing your Storage Account in Databricks
The default cluster main_cluster is already configured to access your storage account. You can access your data stored in Azure Blob Storage, AWS S3, or Google Cloud Storage directly from your Databricks notebook.
With Python, use the following code to access a file in your storage account:
df = spark.read.option("header","true").csv('/mnt/fsdh-dbk-main-mount/sample.csv');
With R, use the following code to access a file in your storage account:
library(SparkR)
sparkR.session()
df <- read.df("dbfs:/mnt/fsdh-dbk-main-mount/sample.csv", source = "csv")
Replace sample.csv with the path to your file in the storage account.
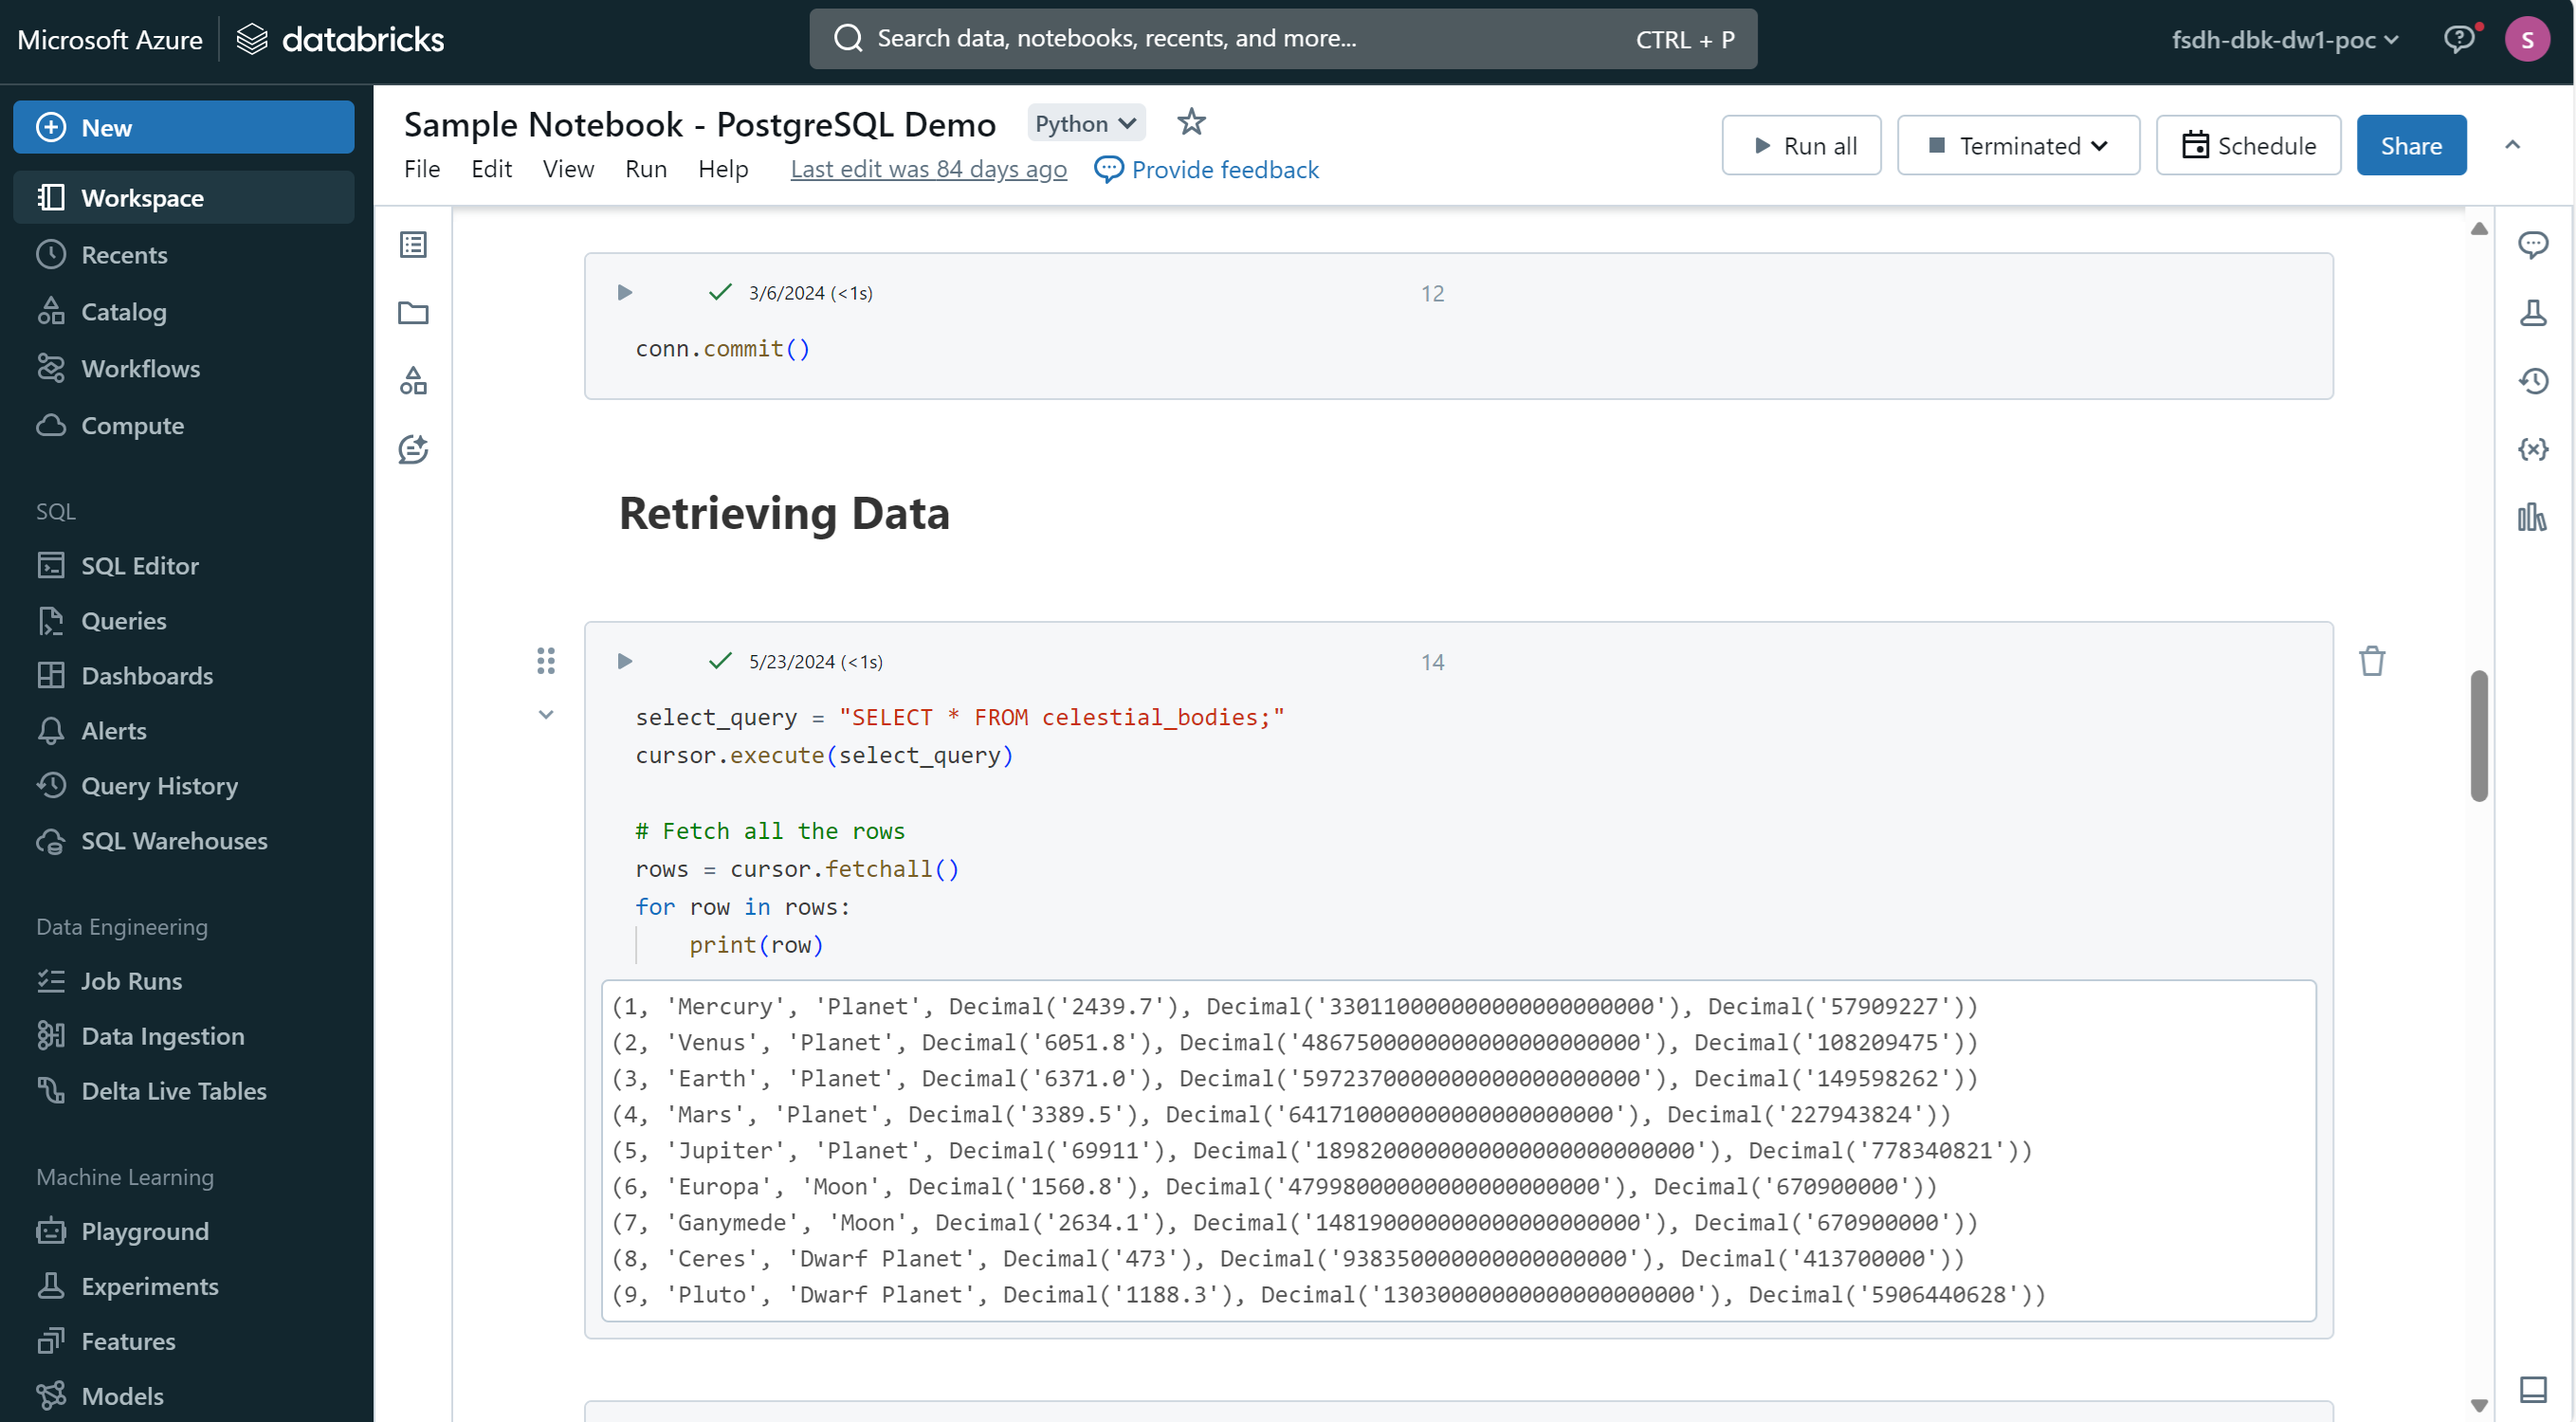
Running a Databricks Notebook
To run a Databricks notebook:
- Write your code in the notebook cells.
- Click on the
Runbutton at the top of the notebook to execute the code in the current cell. - You can also use the keyboard shortcut
Shift + Enterto run the current cell and move to the next one.
You can run individual cells or the entire notebook. Running a cell will display the output below the cell.
Conclusion
This guide provided an overview of getting started with Databricks on the Federal Science DataHub. It covered provisioning and accessing Databricks from the DataHub, managing Databricks clusters, and creating and running notebooks.
Databricks provides a powerful environment for data processing, analytics, and machine learning. By leveraging Databricks on the DataHub, you can collaborate with your team, analyze data, and build machine learning models in a secure and scalable cloud-based environment.
For more advanced topics and in-depth guides, you can explore our Learn section or refer to the official Databricks documentation.